Exporting as CIM/CSV Files
In addition to supporting the import/export of standard CIM/XML files, the Tool also provides import/export support of CIM/CSV files, where each class of CIM object/instances are stored as a flat file. In the CSV file, each CIM object/instance is saved as a row and each attribute/association is presented as a column, separated by commas. These CSV files can be imported into tools like Microsoft Excel for bulk data manipulation. Additionally, because these files are flat in structure, it makes it easier for external applications to consume. For example, these CSV files can be readily loaded into a CIM-compliant relational database.
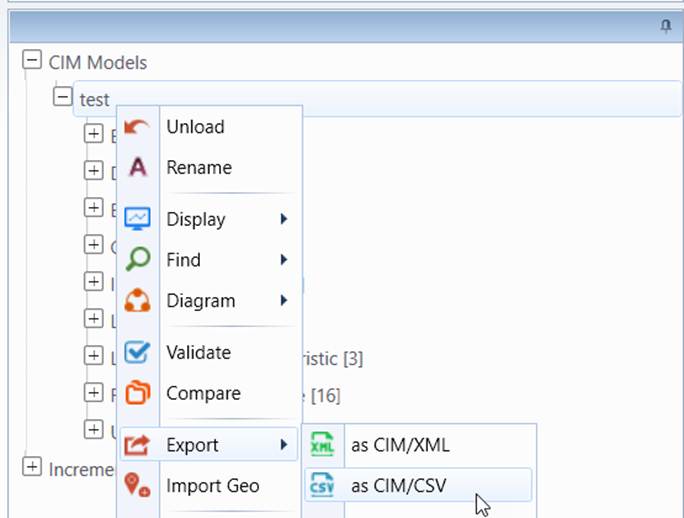
- Right-mouse click the selected model tree item in the Model Explorer navigation tree. Then Select Export →as CIM/CSV in the context menu.
The CIM/XML export function can also be invoked from the icon command in the model summary display, as illustrated below.

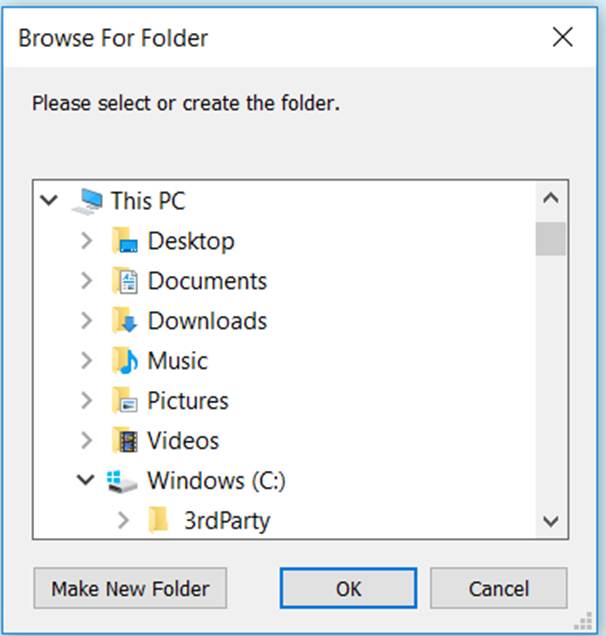
- To export the model to a collection of CSV files, the directory path instead of the file name must be supplied. (Note: The export creates a new subfolder named with the model name and a timestamp, and writes all CSV files there.) This is accomplished through a dialog box, as illustrated below.
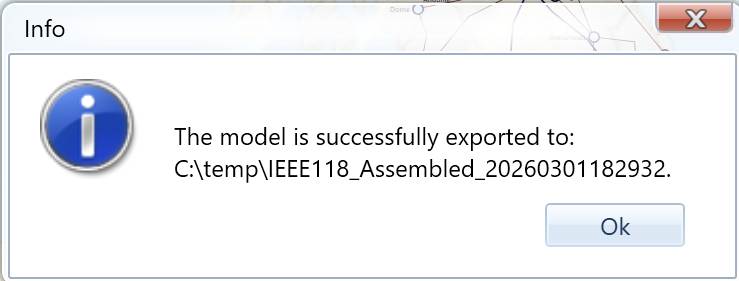
- While the exporting process starts, the UI will be locked from any other activities. Once the exporting is completed, a message box will popup, notifying the status.
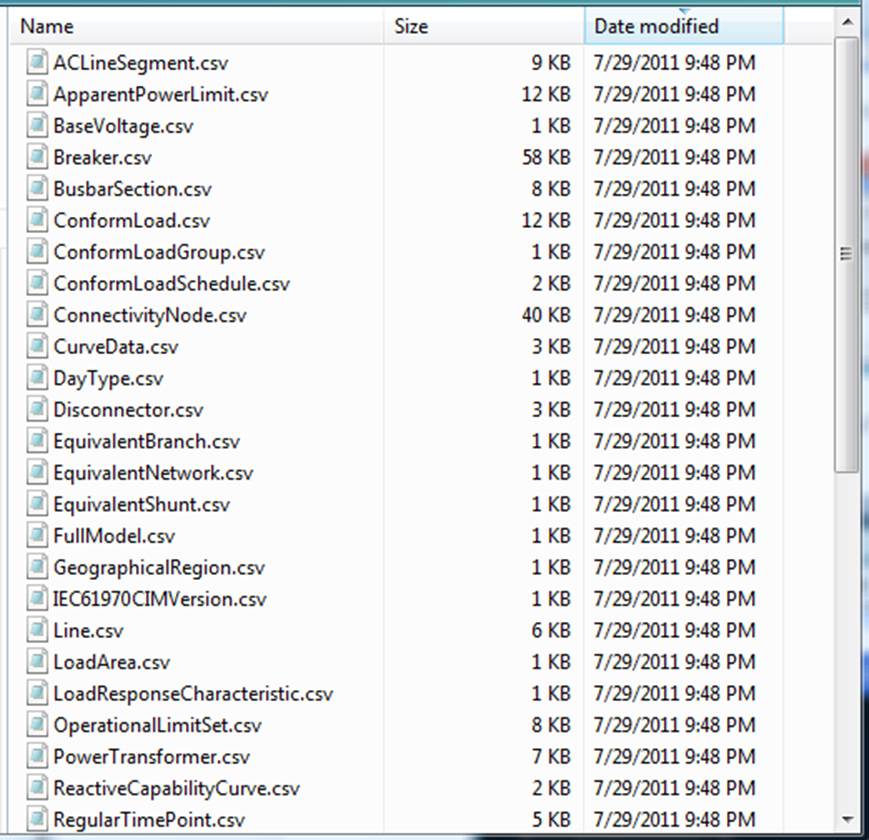
- Check the specified directory/folder to make sure all of the CIM/CSV files are properly exported.
Note
If the model to be exported contains unrecognized CIM extensions, the extended classes/properties will be exported using the same conventions used in Bulk Model Editing. Optionally, the unrecognized CIM extensions can be inferred before the model is exported as CSV.
Check Importing CIM/CSV and Bulk Model Editing for related functions.
Trouble Shooting
There is a potential problem when loading the exported CSV file into Excel. Excel auto-formats the loaded CSV data. For example ‘true/false’ is auto-formatted to ‘TRUE/FALSE’, etc. If you save the auto-formatted data and load the model back to the Tool, you may find some problems by running the validation. There are no ways to disable the Excel auto-formatting feature. However, there is a workaround. To stop the auto-formatting of Excel, you must explicitly tell Excel to treat each column as ‘text’. To do this:
- Change the file name extension from ‘csv’ to ‘txt’
- Start Excel and load the file with ‘txt’ extension
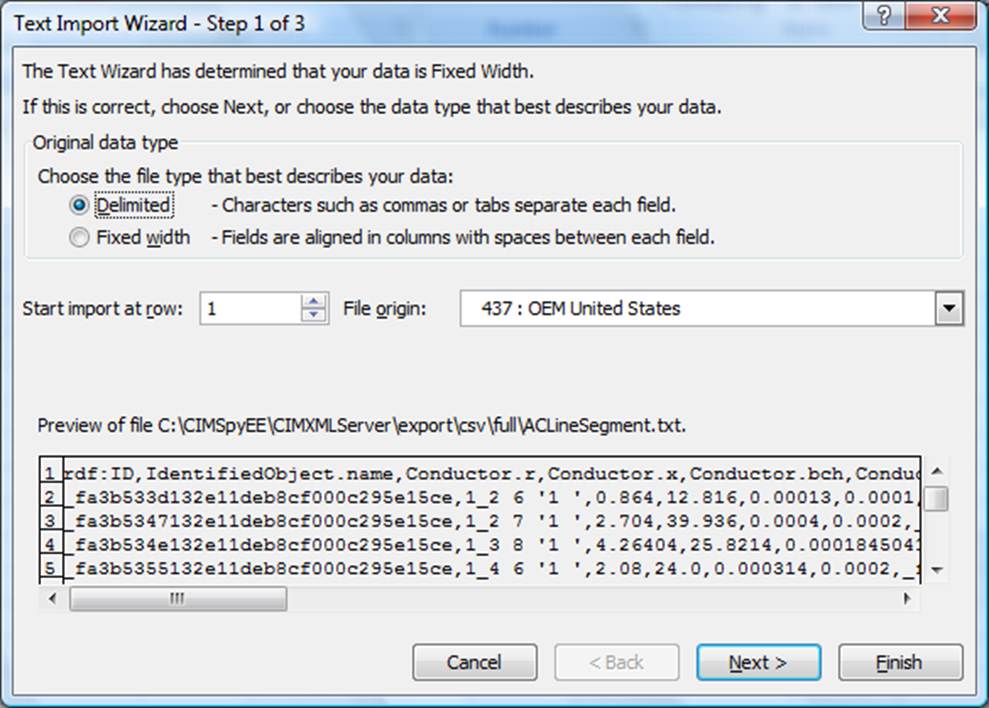
- Text Import Wizard will popup.
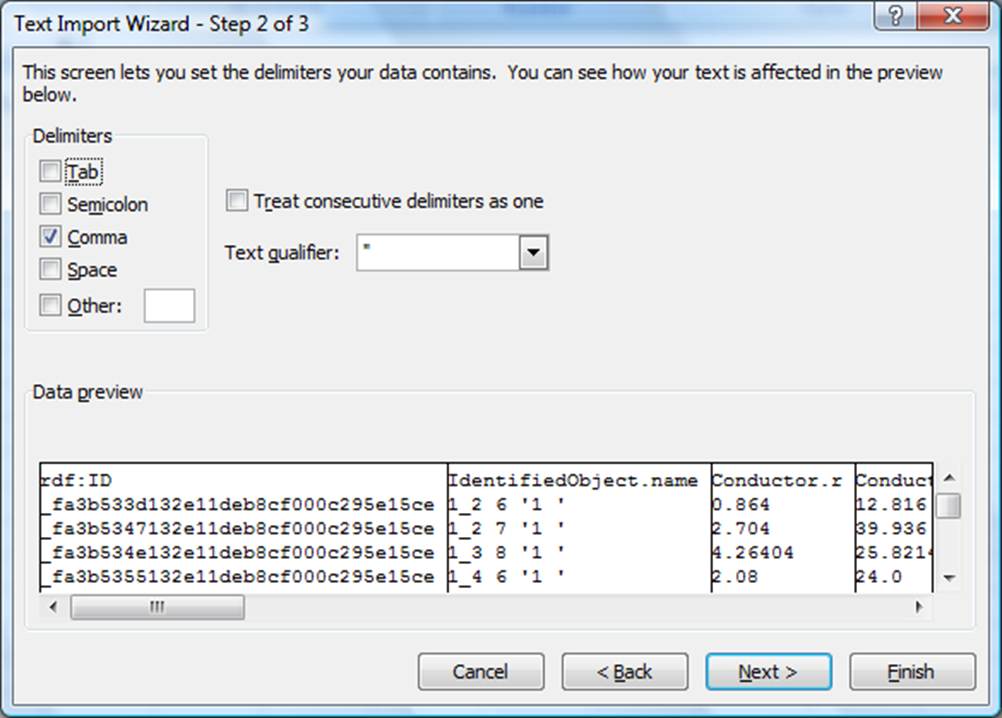
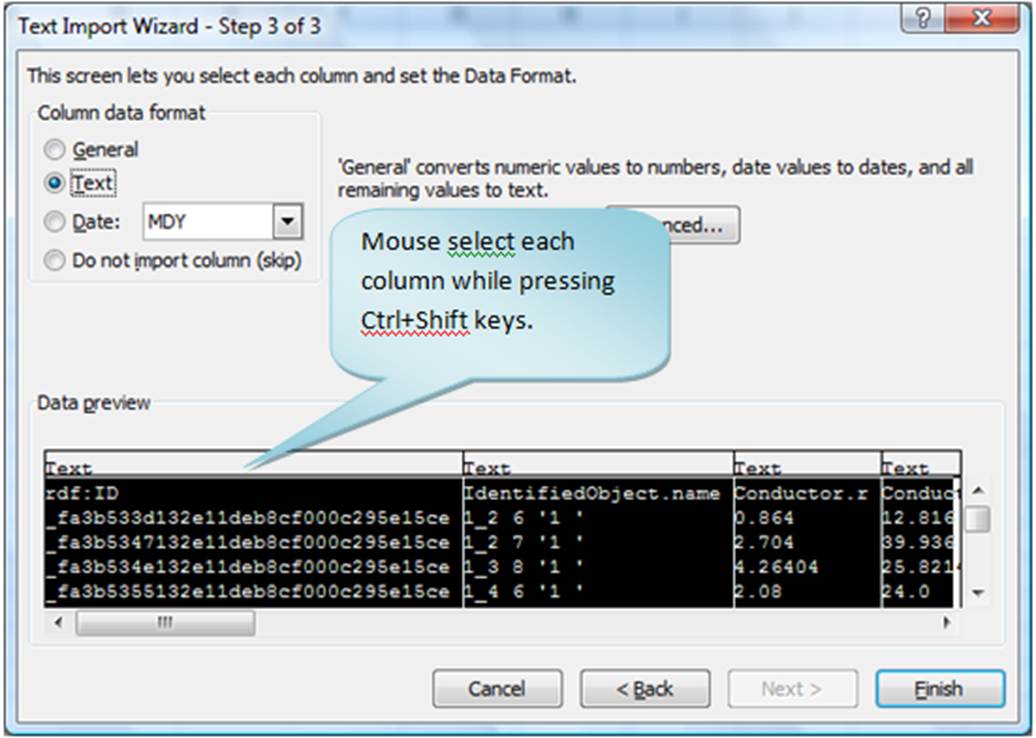
- During the process, choose ‘Delimiters’ as ‘Comma’ only, select all of the columns (through Ctrl+Shift), and set all of the ‘Column data format’ from ‘General’ to ‘Text’ .
- Once the data modification in Excel is completed, save the modified data to a ‘csv’ file. Now the modified CIM/CSV file is ready for importing to the Tool.
The above process is illustrated in the following screenshots captured from Microsoft Excel 2007. The similar process can be applied to other versions of Microsoft Excel.
Note
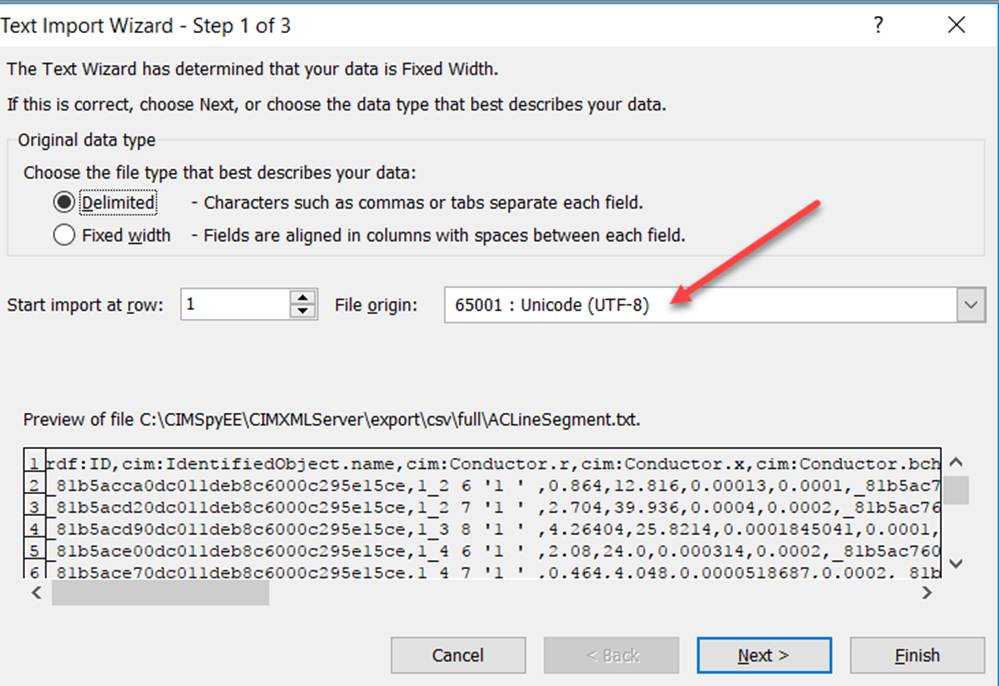
If your model contains none-ASCII characters, Unicode (UTF-8) must be chosen as File origin as illustrated below.
The other workaround is to open the CSV file with a text editor and use its Find/Replace to restore the auto-formatted fields.