Model Maintenance & Management Tutorial
In this hands-on lab tutorial, users will follow step-by-step instructions to setup the Modelspace in Database, configure Modeling Server, and work through a series of Model Maintenance and Management tasks. The goal is to get users familiarized with all core functionalities through hands-on exercises. Users are expected to have already read the Overview article and be familiar with the concepts and terms.
Prepare Lab Computer
There are no special requirements of hardware for this functionality. Any versions of Windows systems shall be applicable. The lab is prepared based on the following assumptions. You may need make proper changes if your environment is different from the assumed.
- Windows 7 64-bit OS is used for this lab.
- The hardware is flexible. The default hardware configuration is expected to be a multi-core Intel i-7 processor or equivalent with 8G RAM and above.
- It is assumed that the latest 64-bit Tool (UI and the Modeling Server) is installed and working properly prior to the start of this lab. But this function doesn’t require the 64-bit installation.
- MS SQL Server 2012 Express is used for hosting Modelspace Database. The first step is to install SQL Server 2012 Express. If SQL Server 2012 Express is already installed, users can skip the “Install MS SQL Express Server” section and go directly to “Configure MS SQL Server for Modelspace” section in the first Step.
Step 1 - Setup Database
The Tool supports virtually any RDBMS via ODBC connector. This tutorial use MS SQL Server 2012 Express.
Install MS SQL Express Server
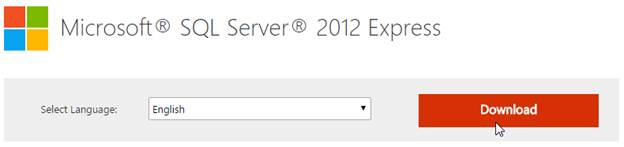
- Download MS SQL Server 2012 Express. In web browser, navigate to the download URL http://www.microsoft.com/en-us/download/details.aspx?id=29062. Click Download button to continue.
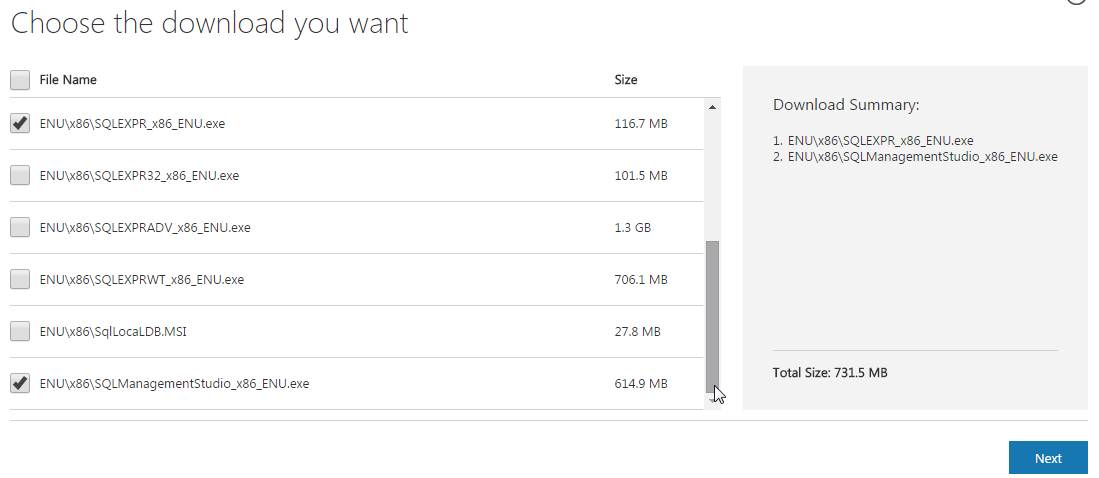
- Users will be prompted to select from a list of installer programs. Scroll to the bottom and select “SQLEXPR_x86_ENU.exe” and management UI “SQLManagementStudio_x86_ENU.exe”. Click Next to download the installers to your local folder.
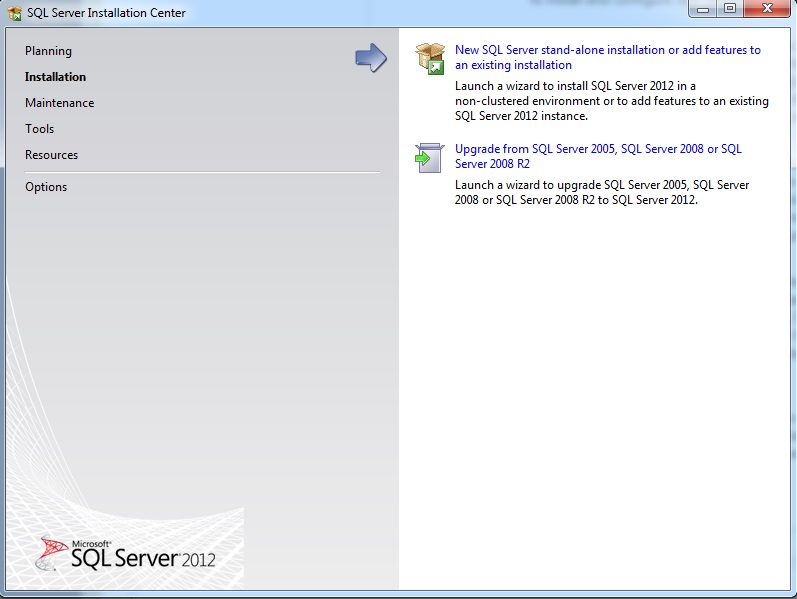
- Next start the installer “SQLEXPR_x86_ENU.exe” by double clicking the downloaded file. The “New SQL Server …” option should be selected when prompted.
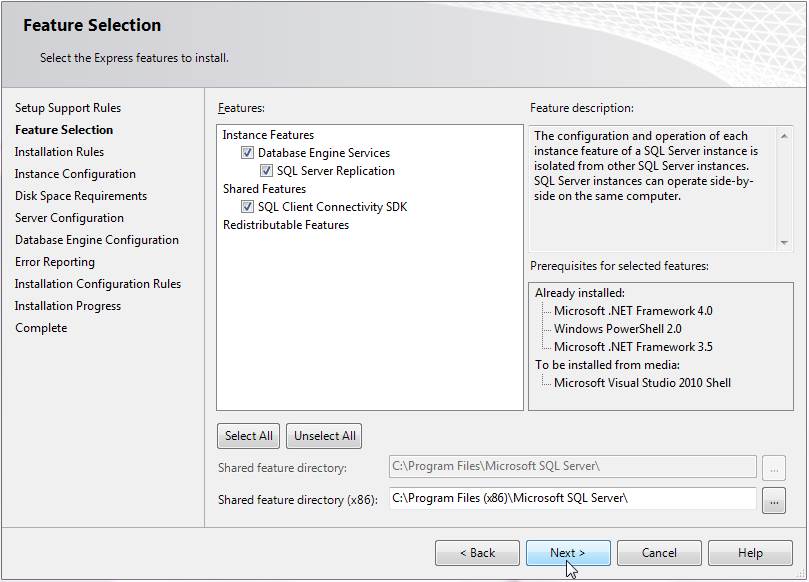
- Keep all the default settings as the installation progresses.
- Use “SQLExpress” as “Named instance” provided by installer.
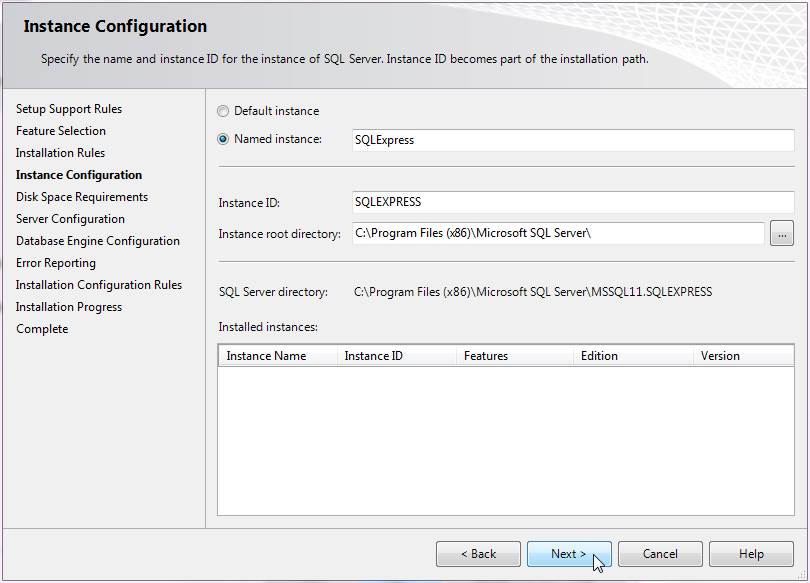
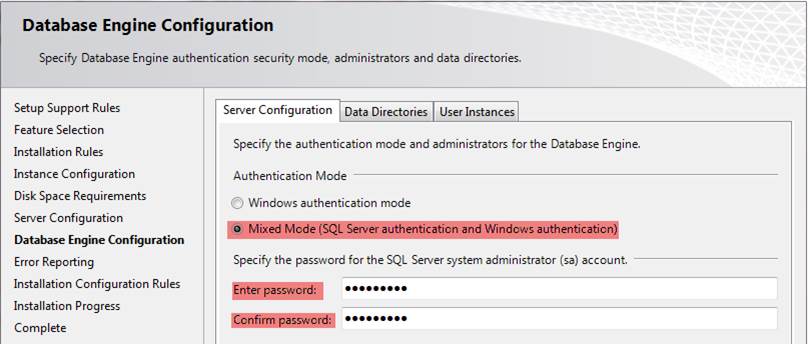
- In Database Engine Configuration, when “Authentication Mode” selection is prompted, select “Mixed Mode” and enter the system password. Keep the password is a safe place.
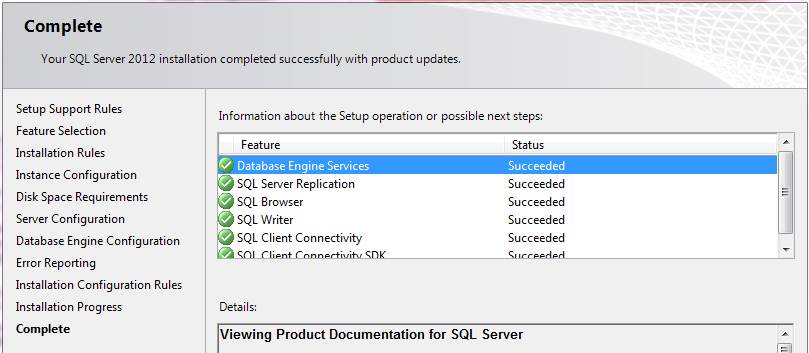
- Follow the installer default settings to complete the installation.
- The next step is to install the SQL Server Management Studio by double clicking the downloaded installer “SQLManagementStudio_x86_ENU.exe”. Again, choose “New SQL Server …” when prompted.
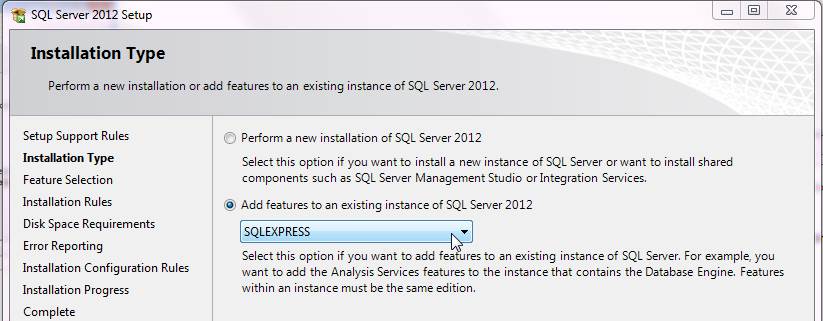
- In Installation Type, select “Add features to an existing instance of SQL Server 2012” and choose “SQLEXPRESS”.
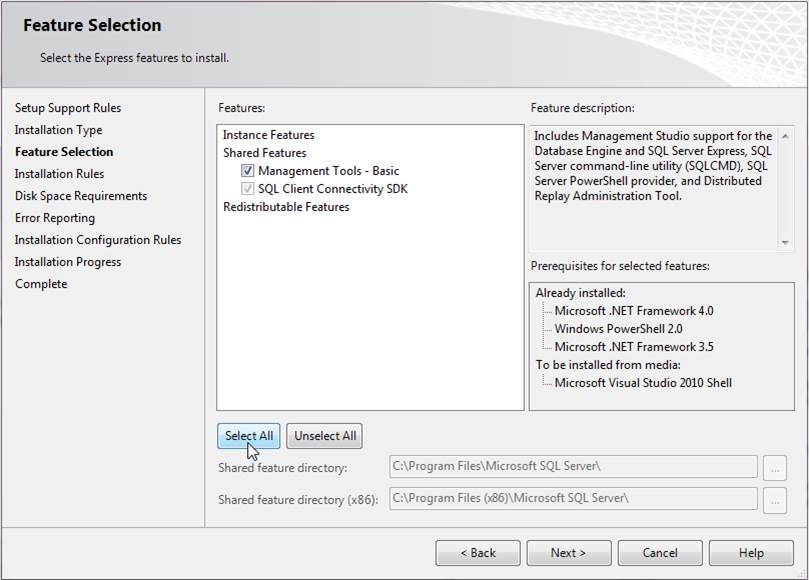
- In Feature Selection, click Select All and Next button to continue.
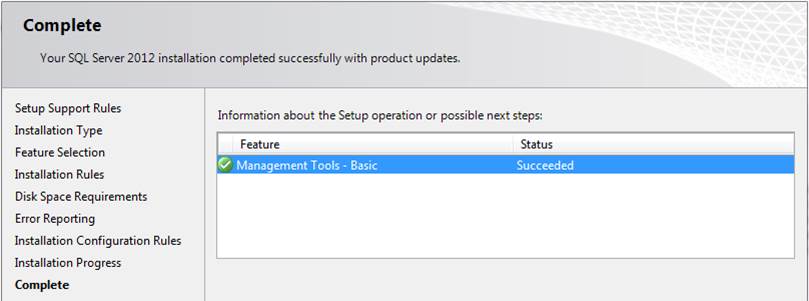
- Complete the installation with default settings
Verify SQL Express Server Installation
SQL Express Server installer will automatically install ODBC Connectors as well. Users can verify the status of installed SQL Express Server and the ODBC Connector drivers.
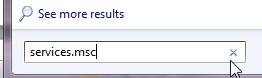
- When installation completes, users can choose to verify SQL Server Express is running on the computer by typing command “services.msc” in the Windows Start search box and enter.
- When Services Manager is launched, look for “SQL Server (SQLEXPRESS)” service. It should show “Started” status. If not, you can manually start it by clicking Start from its context menu.

- When Services Manager is launched, look for “SQL Server (SQLEXPRESS)” service. It should show “Started” status. If not, you can manually start it by clicking Start from its context menu.
- ODBC Connectors are installed automatically. Users should be able to verify the 64-bit ODBC Connector which works with 64-bit Server.
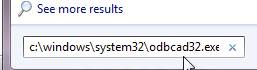
- To launch ODBC Administrator (64-bit) dialog window, type “c:\windows\system32\odbcad32.exe” in Windows Start -> Search box and enter.
- In the ODBC Administrator dialog, click “Drivers” tab. There should be “SQL Server Native Client 11.0” driver there.
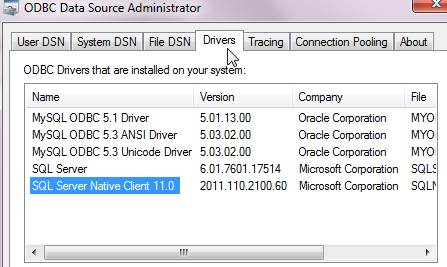
- To launch ODBC Administrator (64-bit) dialog window, type “c:\windows\system32\odbcad32.exe” in Windows Start -> Search box and enter.
Configure MS SQL Server for Modelspace
With both SQL Server and ODBC Connector verified, the next step is to setup Modelspace database.
- First start the SQL Server Management Studio from the Programs Start Menu. Locate SQL Server Management Studio under Microsoft SQL Server 2012, right mouse click to bring up context menu. Click Run as administrator to launch it. (In some cases, not running as administrator has caused problems in SQL Server management activities.)
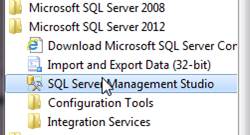
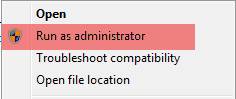
- The SQL Server should have been installed with Mixed Authentication Mode. Users can log in with Windows Authentication without password. Click Connect button to continue.
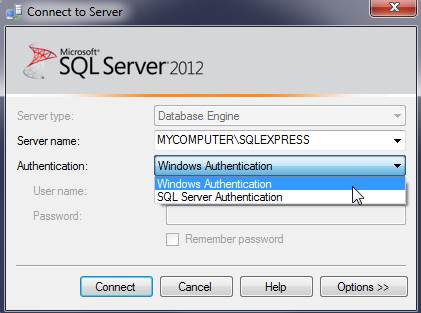
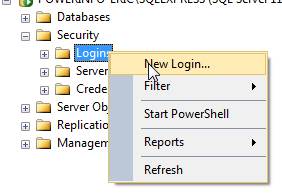
- After log into the management studio, a connection account (New Login) needs to be created for Modeling Server to connect with Modelspace database. In the navigation panel, bring up the context menu Security -> Logins and click New Login…
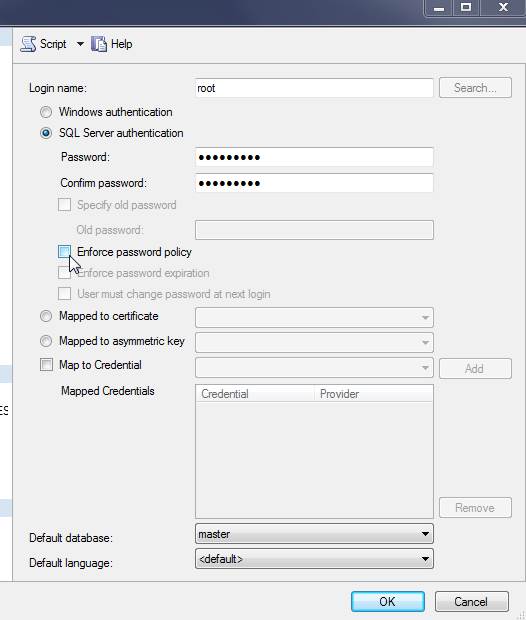
- In the New Login dialog, click “SQL Server authentication” first. Password input box should be enabled. For demonstration purpose, Login name “root” and password “powerinfo” are used. The “Enforce password policy” is unchecked. (NOTE: This Login is for development only. For production setup, always check company’s security policy regarding database connection. Usually, security policy requires a much stronger authentication credentials.)
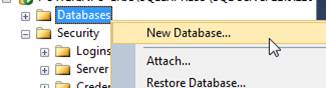
- The next step is to create the Modelspace database. In the navigation panel, right mouse click on Databases. In context menu of Databases, click New Database…
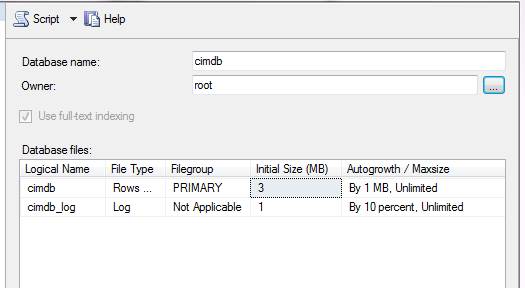
- For this lab, the Database name is given as “cimdb”. For the “Owner” input box, user should type in the Login name “root” just created. Click OK to finalize the database creation.
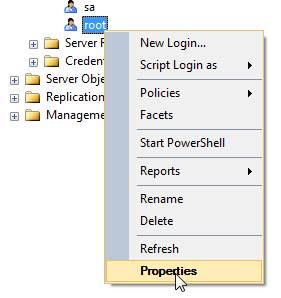
- To verify the Login and Database are properly set up, click Properties in the context menu of Security -> Logins -> root.
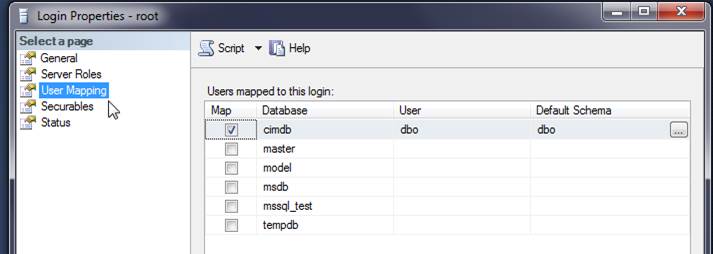
- Select User Mapping page from navigation panel. The proper settings should show “cimdb” is checked and “dbo” is assigned to both User and Default Schema. The Modelspace setup is completed.
- Note: the database name “cimdb” and connection login account “root” and password “powerinfo” are needed for the Server Configuration.
- Note: the database name “cimdb” and connection login account “root” and password “powerinfo” are needed for the Server Configuration.
Users can refer to this article for other RDBMS setup and trouble shooting. The next step is to configure Modeling Server to connect to database.
Step 2 – Configure Database Connection in Modeling Server
For Modeling Server to communicate with Database, the database connection (DBConnection) configuration must be set. The default configuration is set to work with this lab. Users don’t need to change it if the Modelspace database has been configured according to the previous instructions in this tutorial.
However, if users would like to verify the settings or make a change, the settings are located in custom configuration file “CustomConfig.xml” in the Modeling Server’s config folder.
- Open the configuration file (i.e. CustomConfig.xml under \CIMSpy\config) with an xml or any text editor, such as Visual Studio. The Tool comes with a set of DBConfig settings for connection to MS SQL Server Express, MS SQL Server, Oracle, and MySQL. Only the DBConfig for MS SQL Server Express ODBC connection is enabled. Others are commented or disabled. They are included for your reference in case you want to create your own ODBC connections to other databases. Find DBConfig under ModelConfig -> IOConfig. Make sure it contains the following DBConnection “TEST_MSSQL_EXP_ODBC” for database “cimdb” in MS SQL Express.
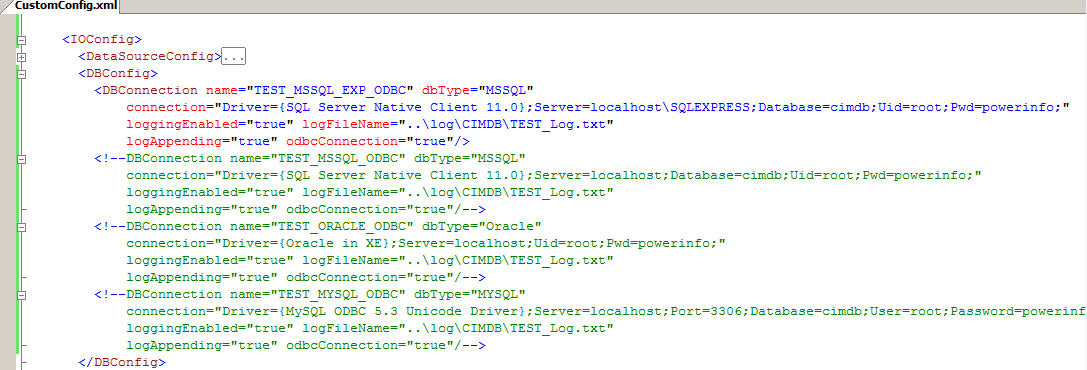
- If the “TEST_MSSQL_EXP_ODBC” DBConnection is missing, add the following XML string under DBConfig. The connection string contains Database “cimdb”, Login account name “root” and password “powerinfo”. Do not make duplicated DBConnection.
<``DBConnection name``=``"TEST_MSSQL_EXP_ODBC" dbType="MSSQL"
connection``=``"Driver={SQL Server Native Client 11.0};Server=localhost\SQLEXPRESS;Database=cimdb;Uid=root;Pwd=powerinfo;"
loggingEnabled``=``"true" logFileName="..\log\CIMDB\TEST_Log.txt"
logAppending="true" odbcConnection="true"/>
Users can refer to this article for details and trouble shooting. This completes the database setup. The next step is to Initialize Modelspace with the test CIM model “Test CIM/XML”.
Step 3 - Initialize Modelspace
The “cimdb” is an empty database at this point. It will be initialized with the seed test model “Test CIM14”.
- The model needs to be loaded into the Tool. Select it from download menu and click Load.
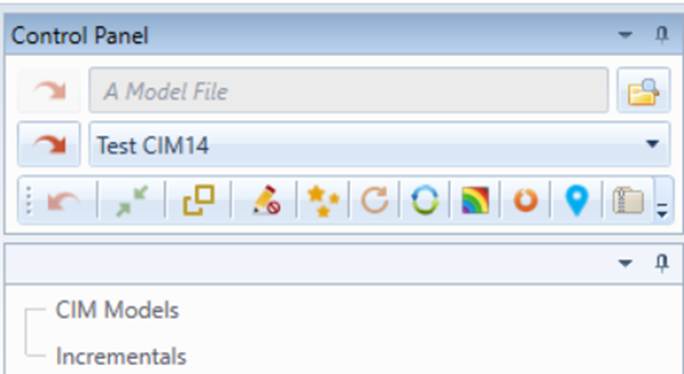
- Initialize the database with the loaded model.
Step 4 - Load a Draft Version
- Navigate to Model Admin UI.
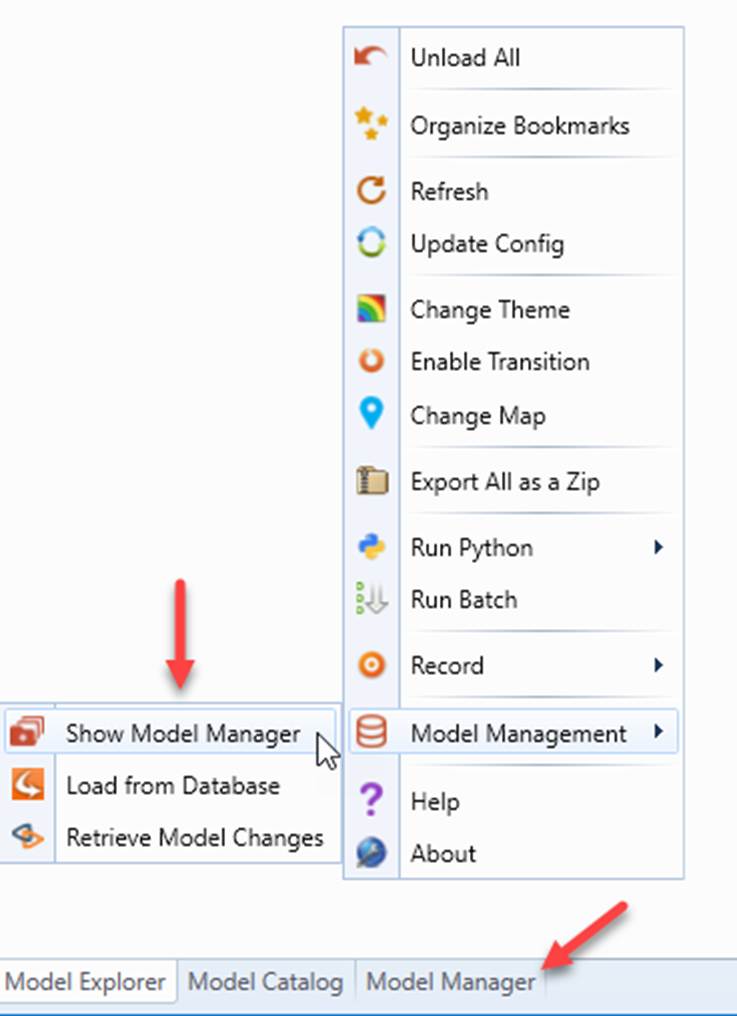
- Load a Draft Version into workspace.
Step 5 - Make Model Changes
The Draft model can be edited just like a model loaded from CIM XML file. Make some model changes using either object-based data editor or graphical model editor.
Step 6 - Submit Model Changes
When there are enough model changes ready to be committed permanently into the Modelspace database, users can submit model changes.
Step 7 - Label a Draft Version and Create a New Version
When a Draft Version reaches a milestone, users can Label the Draft Version. A Labeled Version is no longer editable. All Submitted Changes are encapsulated in this Labeled Version.
Step 8 - Update Version Information
The Tool will provide a default name when a new Draft Version is created. It is often desirable to update the version information. Both Draft and Labeled Version can be updated in the same way.
Step 9 - Assemble a Version of Model for Release
The assembling process can be performed by simply loading a Version of Model into the workspace, and then exported as a CIM/XML file.
Step 10 - Extract Version Changes
Model Changes between Versions can be extracted.
Step 11 - Import External Changes
External CIM Incremental can be imported.
Step 12 - Manage Concurrent Modeling Tasks
Model versions can be branched or merged to support concurrent modeling tasks.
Conclusion
This tutorial covers only two typical use cases in model maintenance and management process: the time-based routine maintenance (linear hierarchy) and concurrent projects management (branching hierarchy). The Tool is flexible and powerful enough to support plenty of variations in model management requirements. Understanding the basic functionalities in this lab, users can fit this Tool to their own process.