Scripting Example 2: Iterating through a Model
This script is designed to demonstrate how models can be iterated at various levels, i.e. model/ /object/property. It is designed to show users how to systematically apply a custom processes by iterating through a collection of modeling entities. More specifically, the script walks through the model contents in the following order:
- Display all of the loaded models.
- Display all of the classes for the specified model.
- Display all of the Objects of a given class, subject to the specified max number.
- Display all of the properties of a given class.
- Display all of the properties values for the Objects of a given class, subject to the specified max number.
The script takes two optional parameters: class name and max number of objects to display. If the parameters are not provided, default parameters will be used. The default class name is cim:Substation and the default maximum number of displayed objects is 10.
The script can be run either as a model-independent custom process or initiated from a model as a model-specific custom process. If the former case, a default model will be loaded.
Hands-on
Invoked ‘Run Python→via Config’ from the global context menu, which can be initiated by right-mouse-clicking a bank spot in the tree Panel. A popup wizard window will appear. Select the script function configuration titled “Iterate AC Lines” from the popup dropdown list.
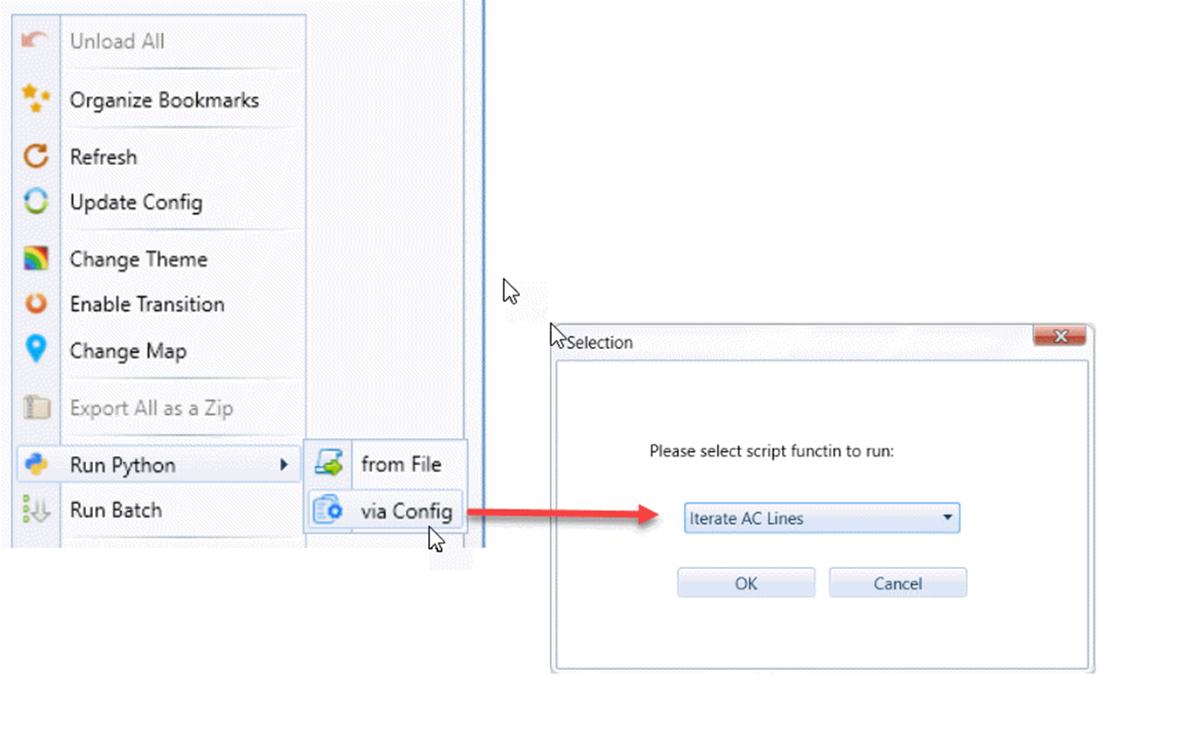
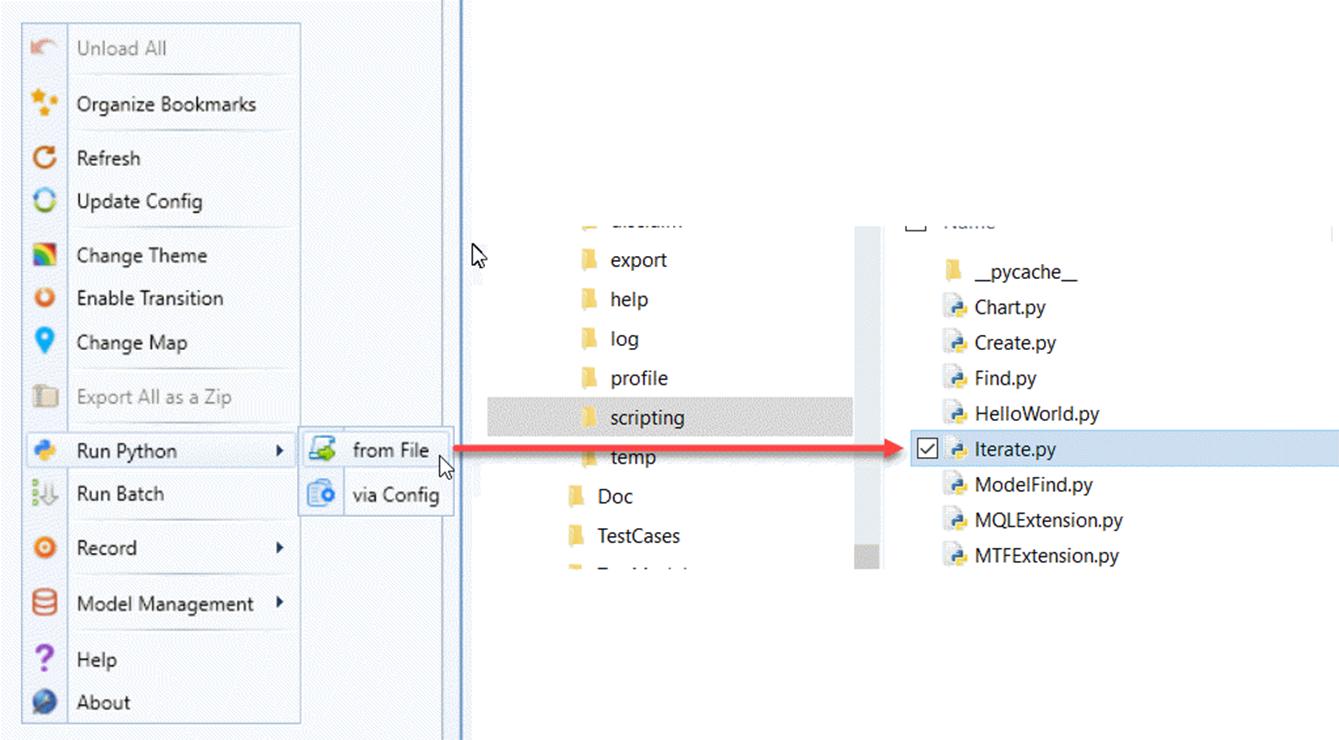
If the popup window is not displayed, that means you don’t have the pre-defined script functions in your configuration. Alternatively, you can run the same script from the file directly, as illustrated below. Note when running from the script file, no parameters will be passed. So the default parameters will be used. The script actually iterates Substation”.
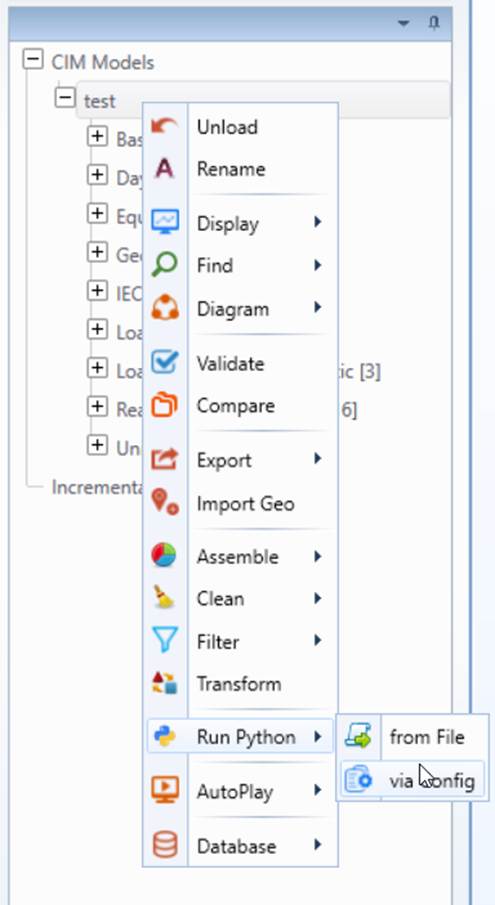
The script can also be executed as a model-specific custom process. It can be invoked from a context menu associated with a model, as illustrated below. When executed as a model-specific custom process, it will iterate through the specific model from which the script is invoked.
If the execution is successful, you will get the following prompt,
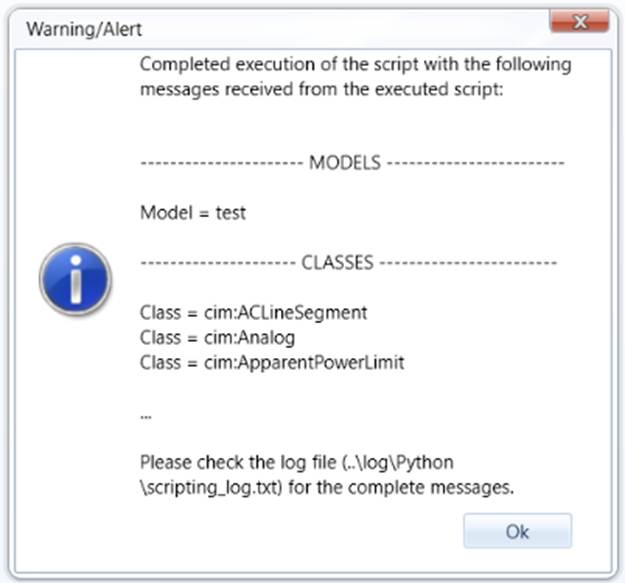
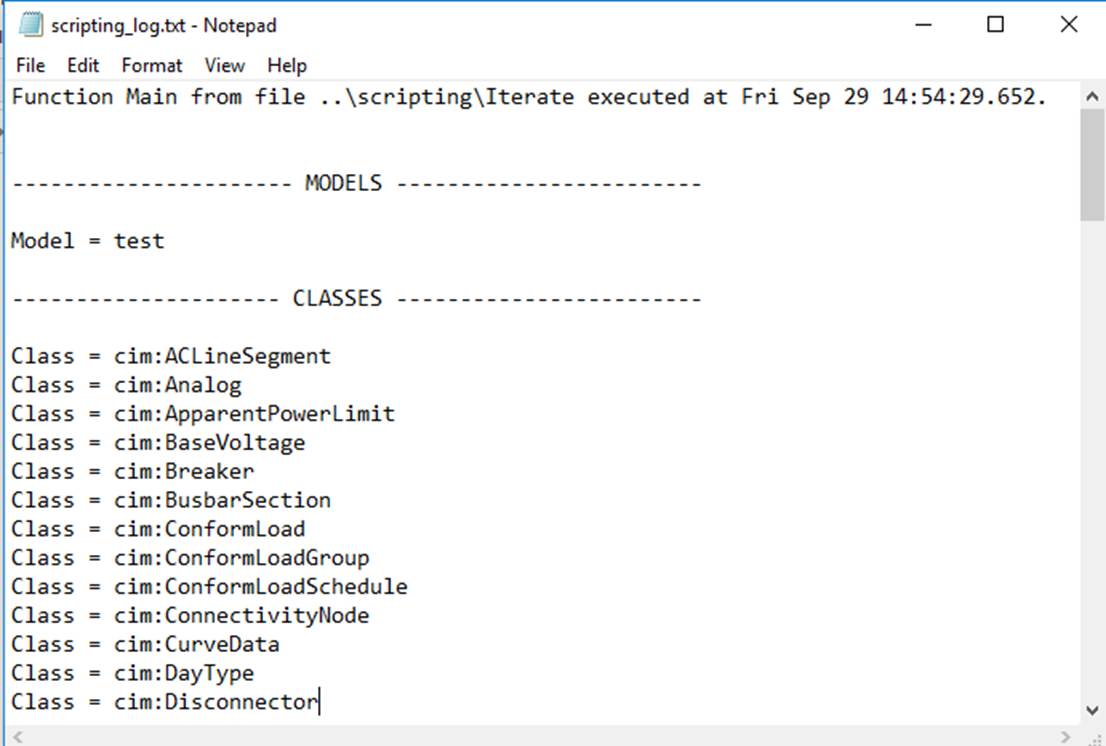
The full messages are logged in \CIMSpy\log\Python\scripting_log.txt, as illustrated below.
Code Analysis
The script function configuration, defined in the CustomConfig.xml, is shown below:
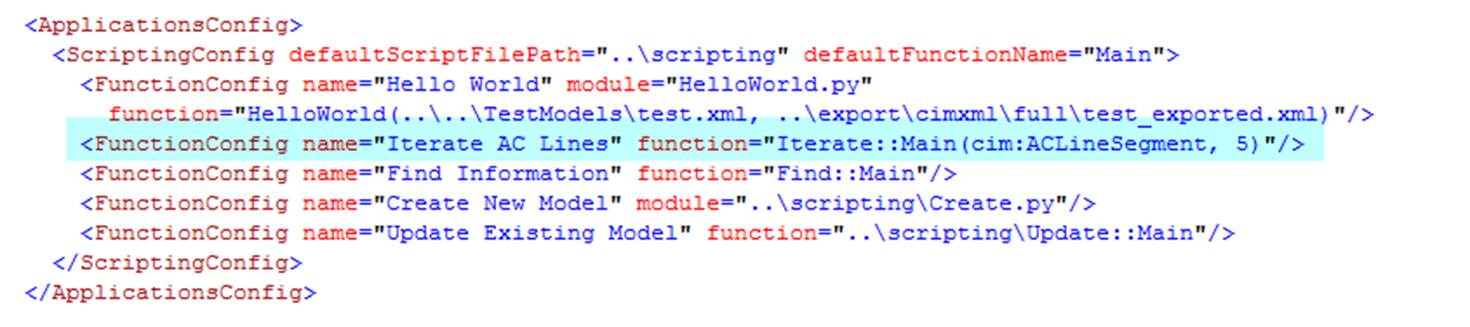
The script takes two optional parameters: class name and max number of objects to display. The Iterate function highlighted above is configured to iterate the first 5 ACLineSegments. If the parameters are not provided, default parameters will be used. The default class name is cim:Substation and the default maximum number of displayed objects is 10.
The executed script, located under folder \CIMSpy\scripting, is explained below.
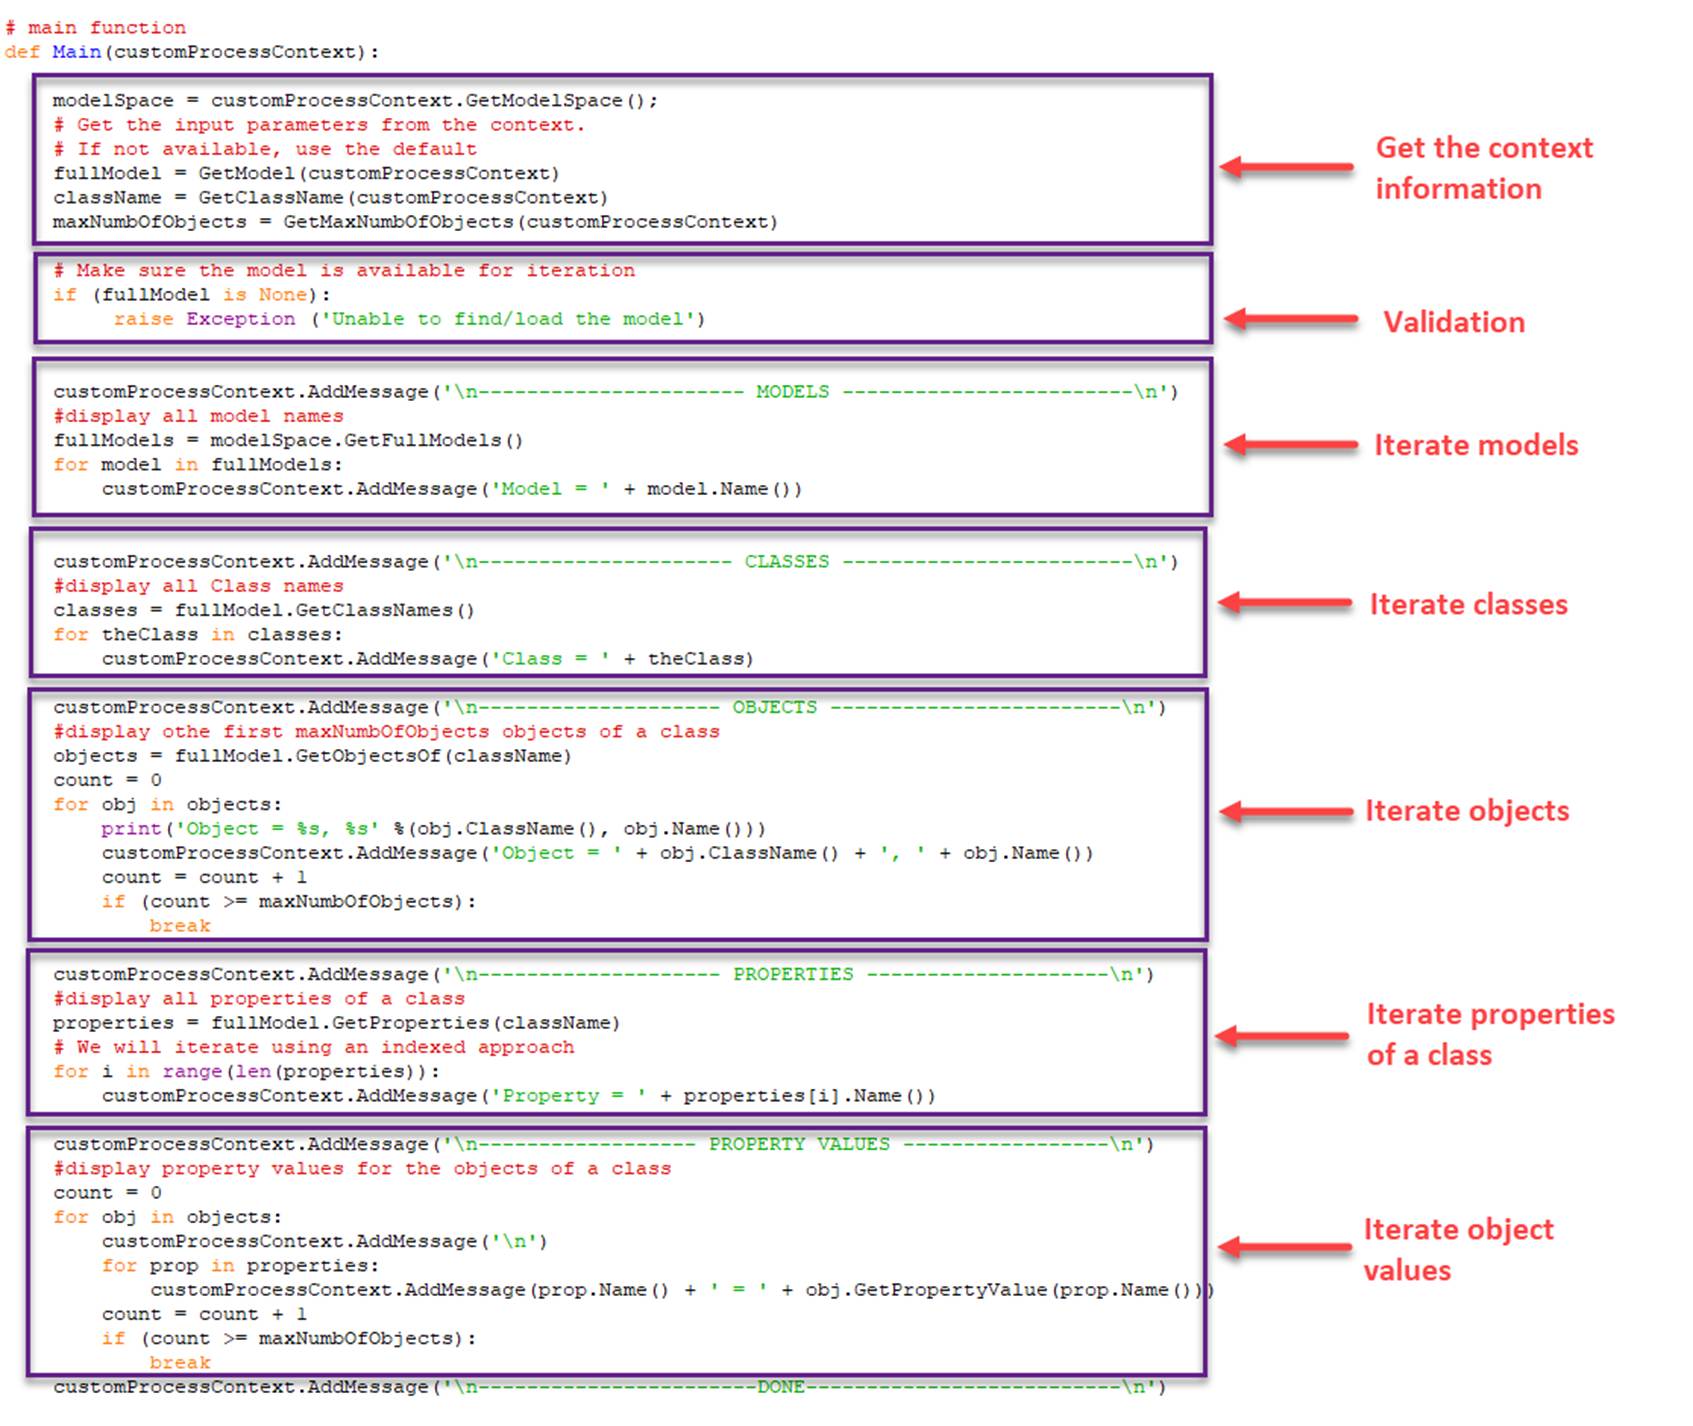
The Model APIs are designed to facilitate the model iteration. The related APIs return a collection object which can be iterated as a typical Python collection object, as illustrated below
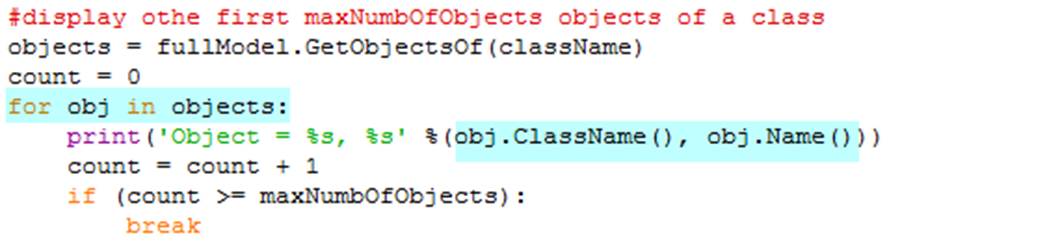
Because the collection object is wrapped as a vector (or an array), it can also be iterated using the index

The two iteration approaches are equivalent in performance.
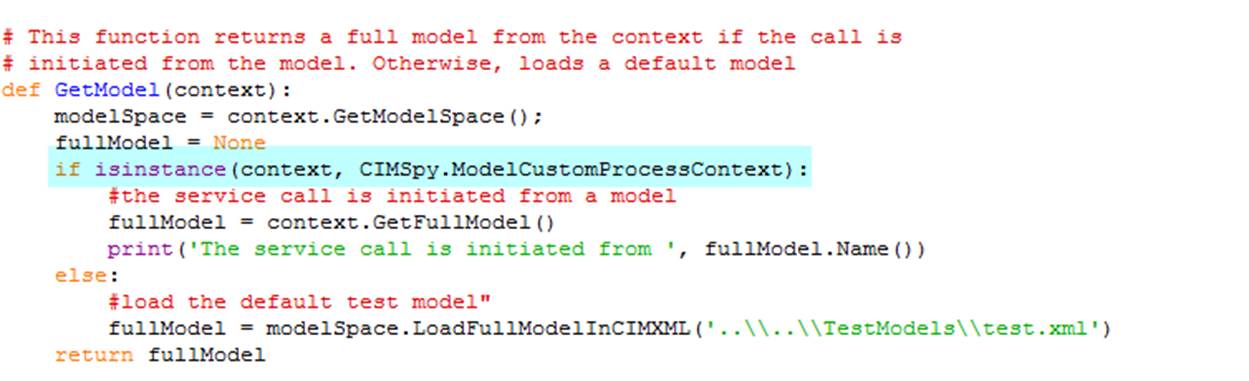
One of the tricks of this script is it was designed to support both model-independent custom process and model-specific process. In the latter case, a FullModel object is provided as part of the context information. The highlighted code below illustrates how to dynamically discover which custom process is invoked.