Model Management Tutorial
In this tutorial, users will be guided to go through the full model build cycle aimed at maintaining an as-build operational model. The model build workflow is illustrated as below.
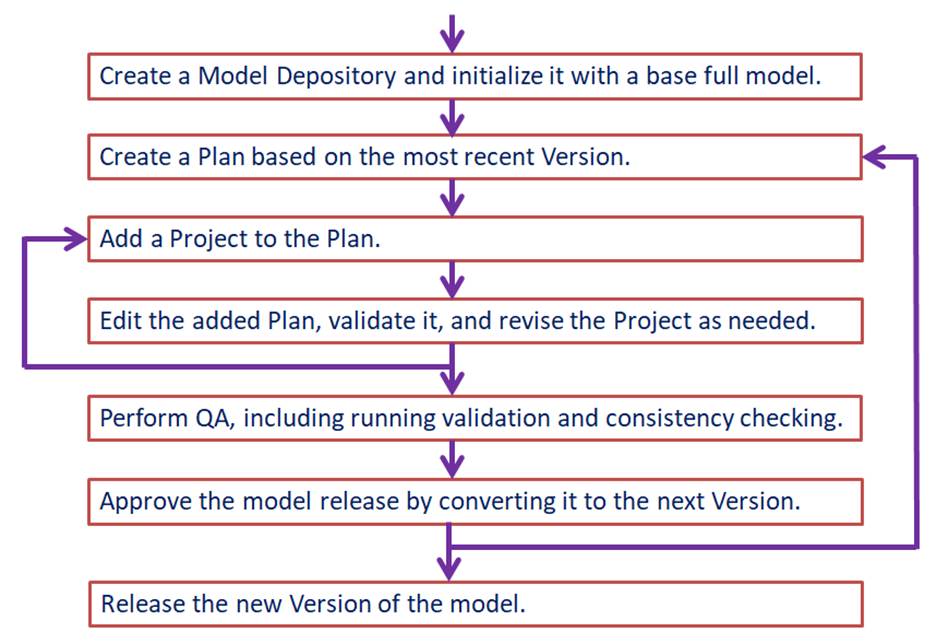
The tutorial uses file-based Model Depository. Majority of the contents are also applied for database Model Depositories.
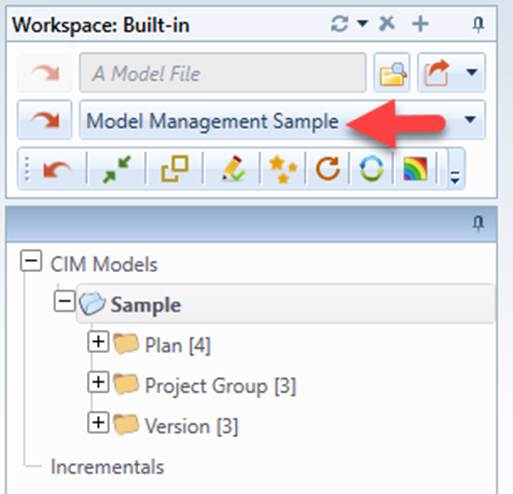
A Model Management Sample is included in the Tool. Users shall refer to this sample for reference. The sample can be loaded from the data source dropdown, as illustrated below:
Create and Initialize a Model Depository
- Before a Model Depository is created, the “seed” model used to initialize the Model Depository must be loaded in into the workspace. The “seed” model is normally from your current EMS system. In this tutorial, we will used Test_CIM15 as seed model, which can be loaded from the data source dropdown, as illustrated below.
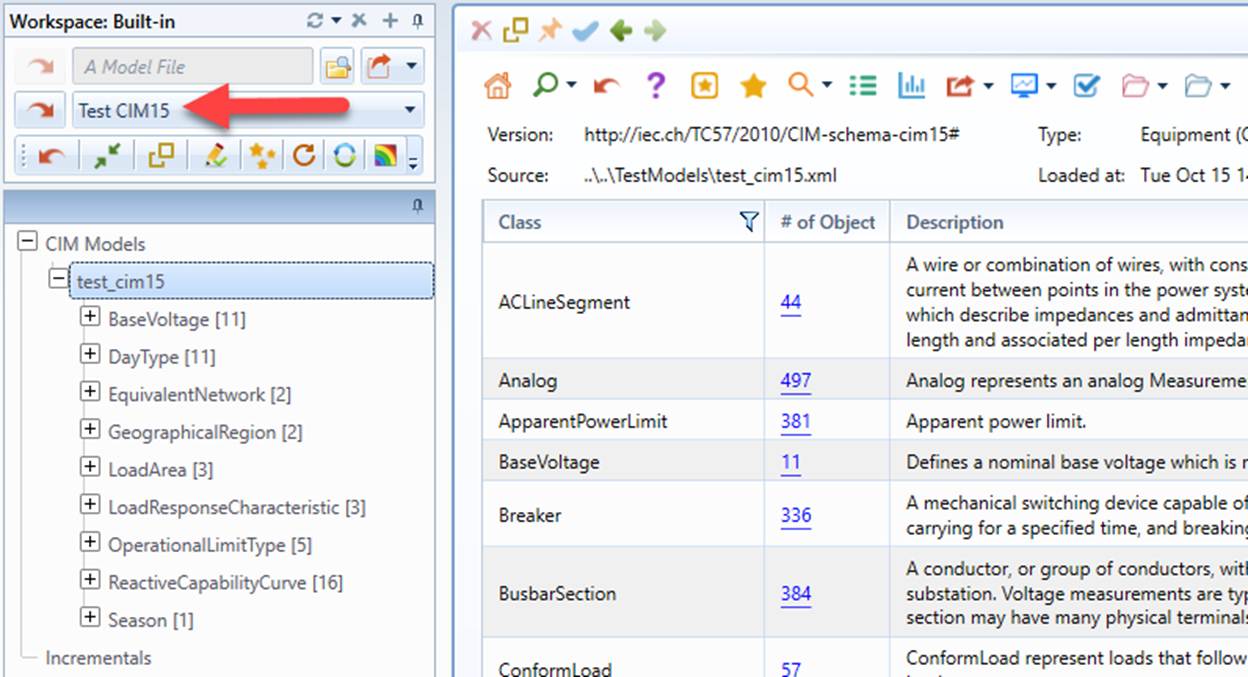
- Once the “seed model” is loaded into workspace, users can start creating a file based Model Depository.
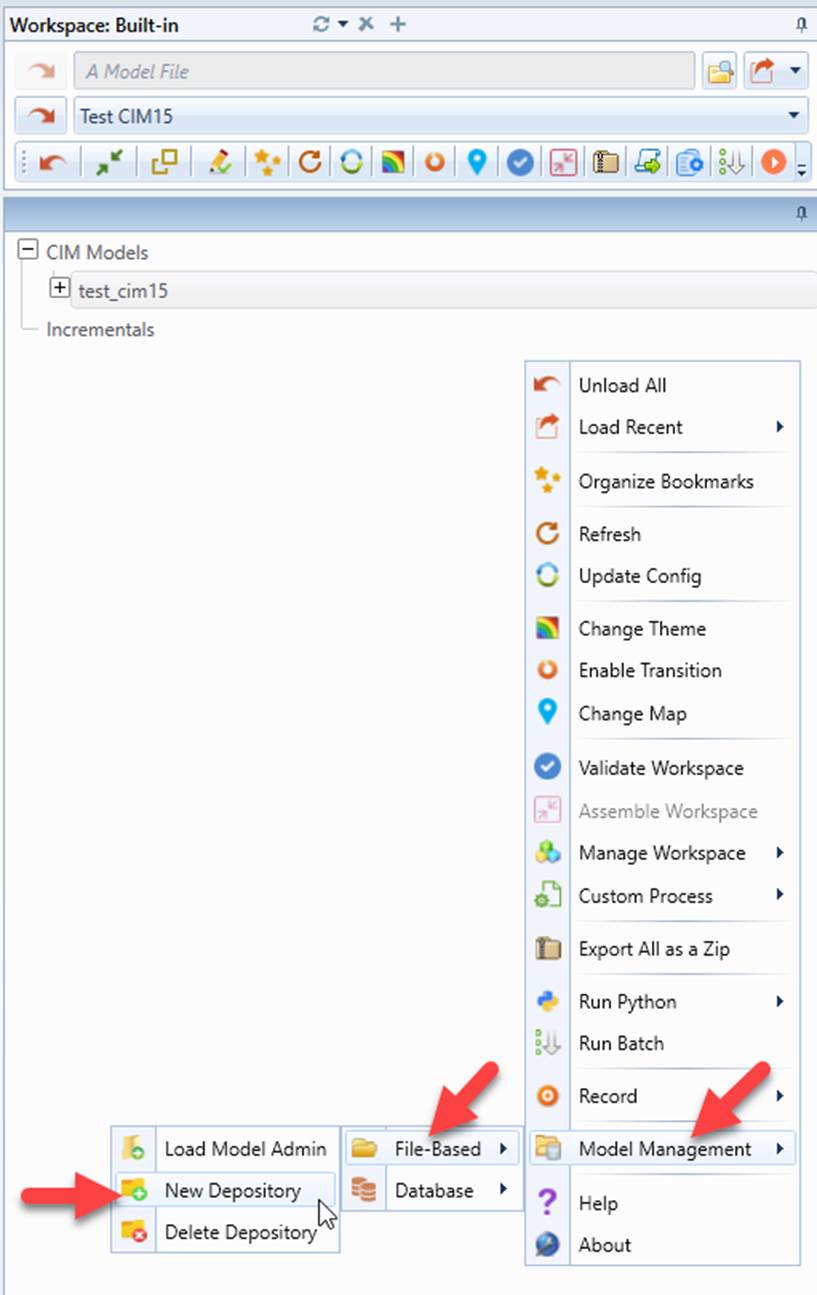
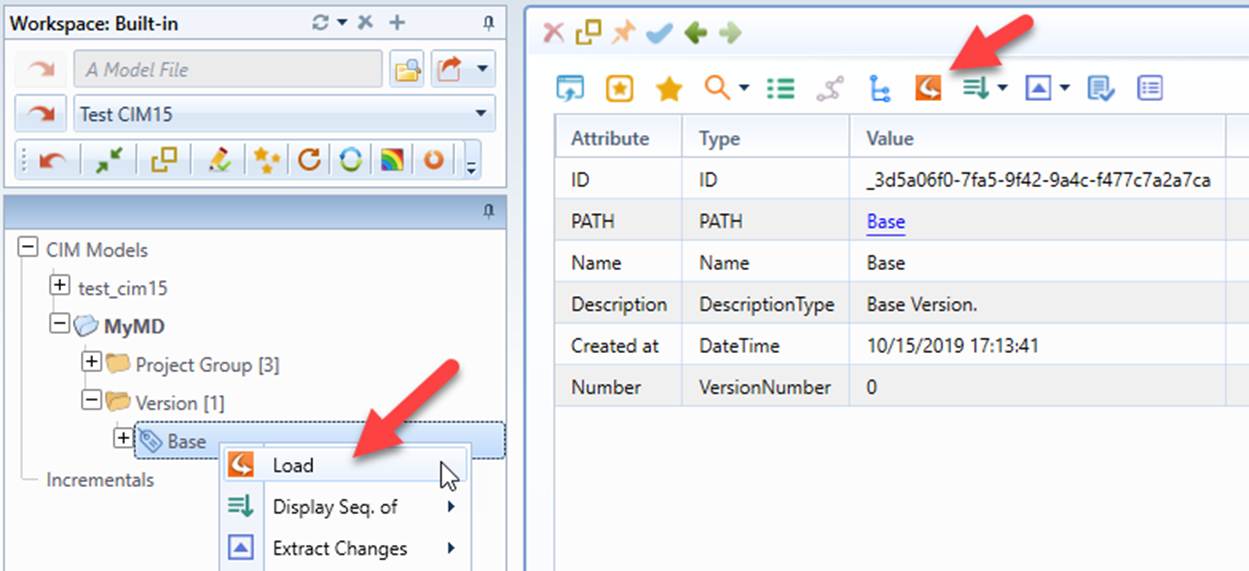
- For sanity checking, load the Base Version to the workspace.
- Compare the Base Version of the loaded model with the “Seed” model used to initialize the Model Depository.
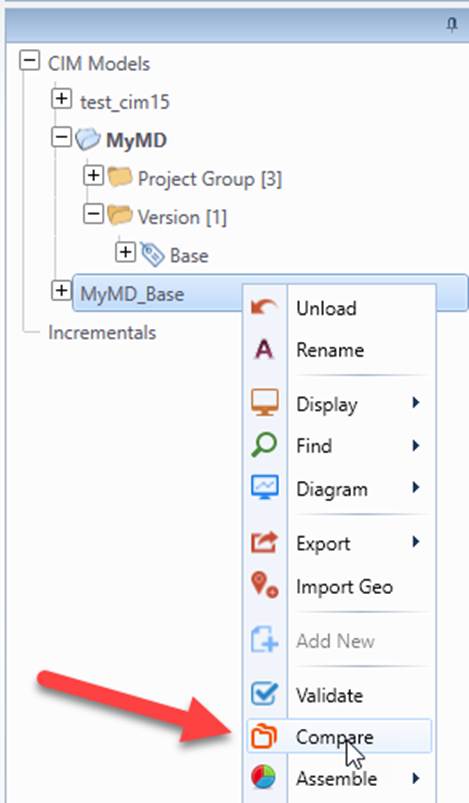
- The two loaded models shall be identical. Unload both of them.
Add and Setup a Plan
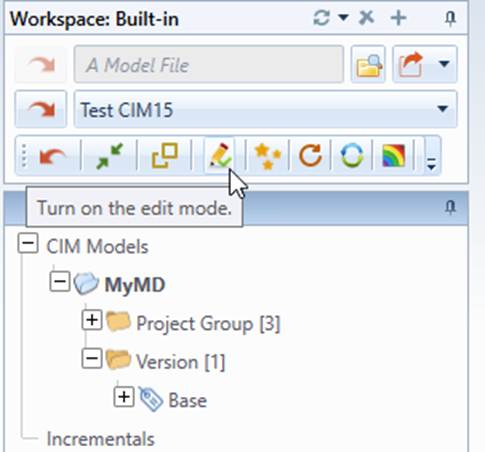
- Before making any changes to the newly created Model Depository, the Edit Mode must be turned on.
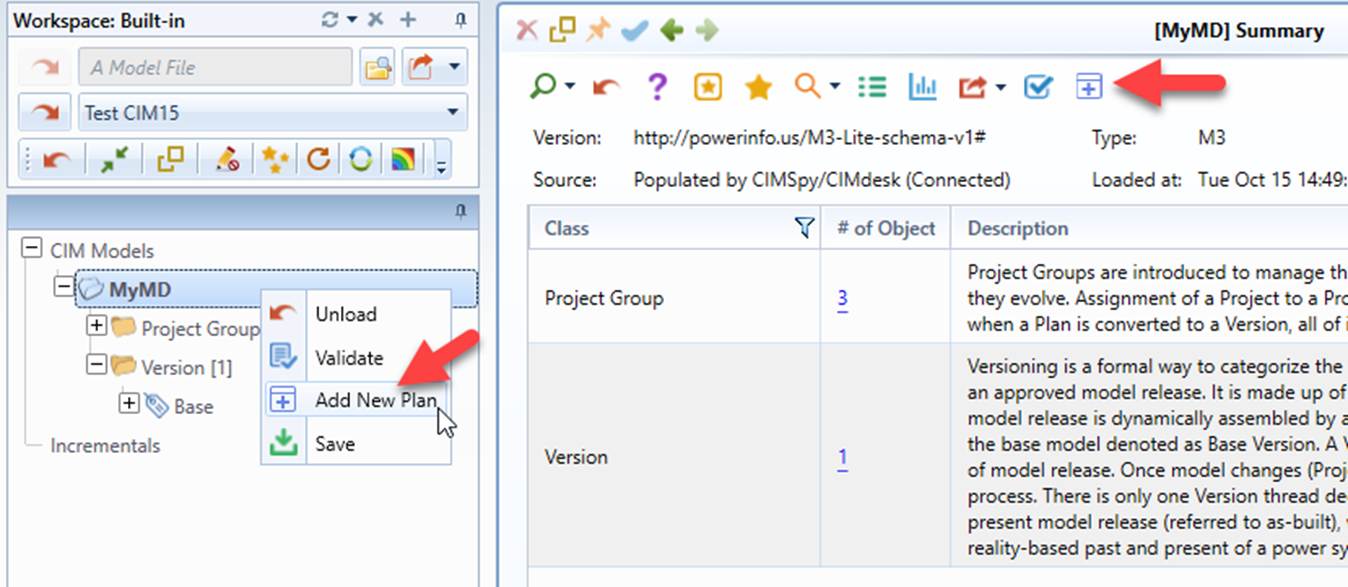
- Add a new Plan to prepare for the next model release.
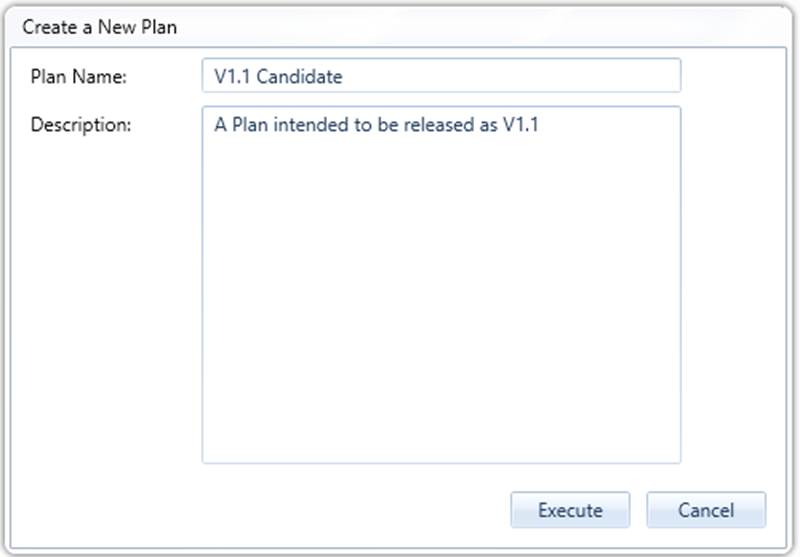
- Provide a unique name for the new Plan and description about the Plan.
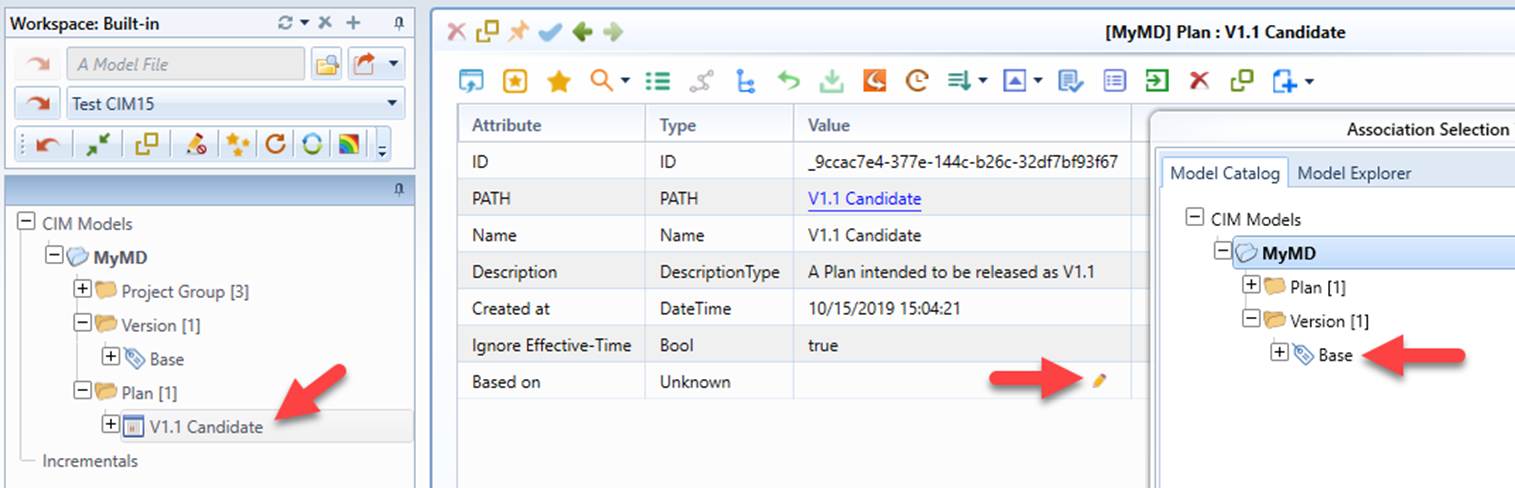
- Set the Plan to be based on the Base Version. By default the Plan is sequence-based. Keep this default setting.
Add a Change Set/Project
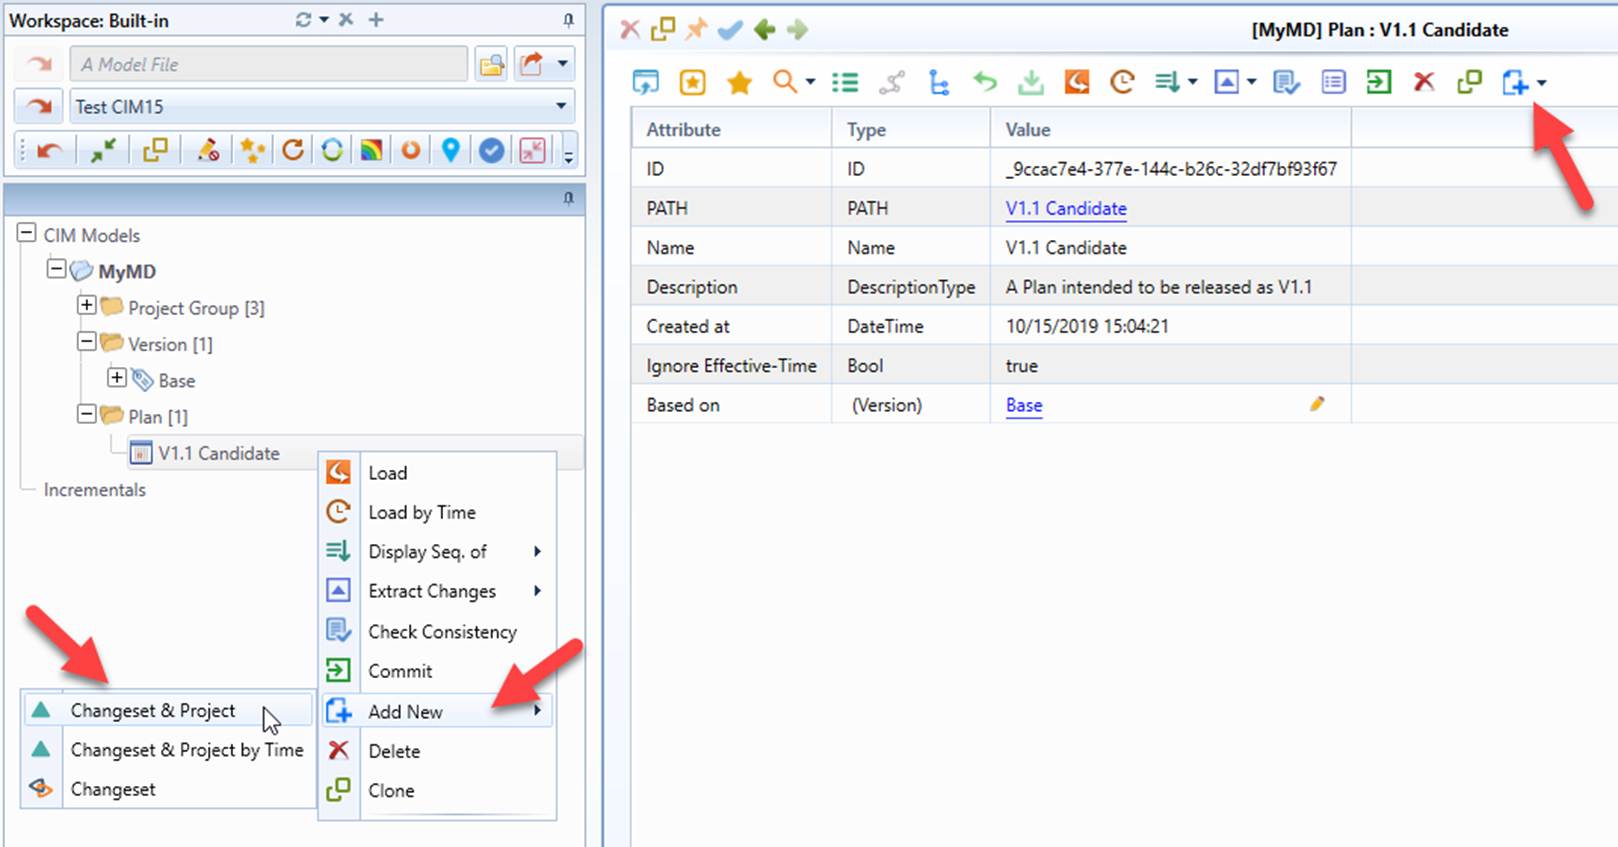
- Add a pair of Changset/Project to the Plan added above.
- Provide a unique Project name and free-text describing the Project to be added.
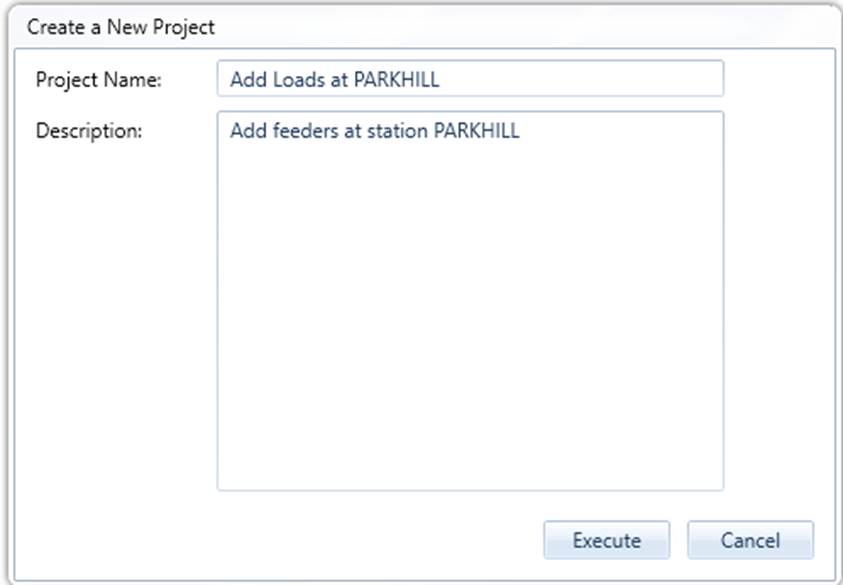
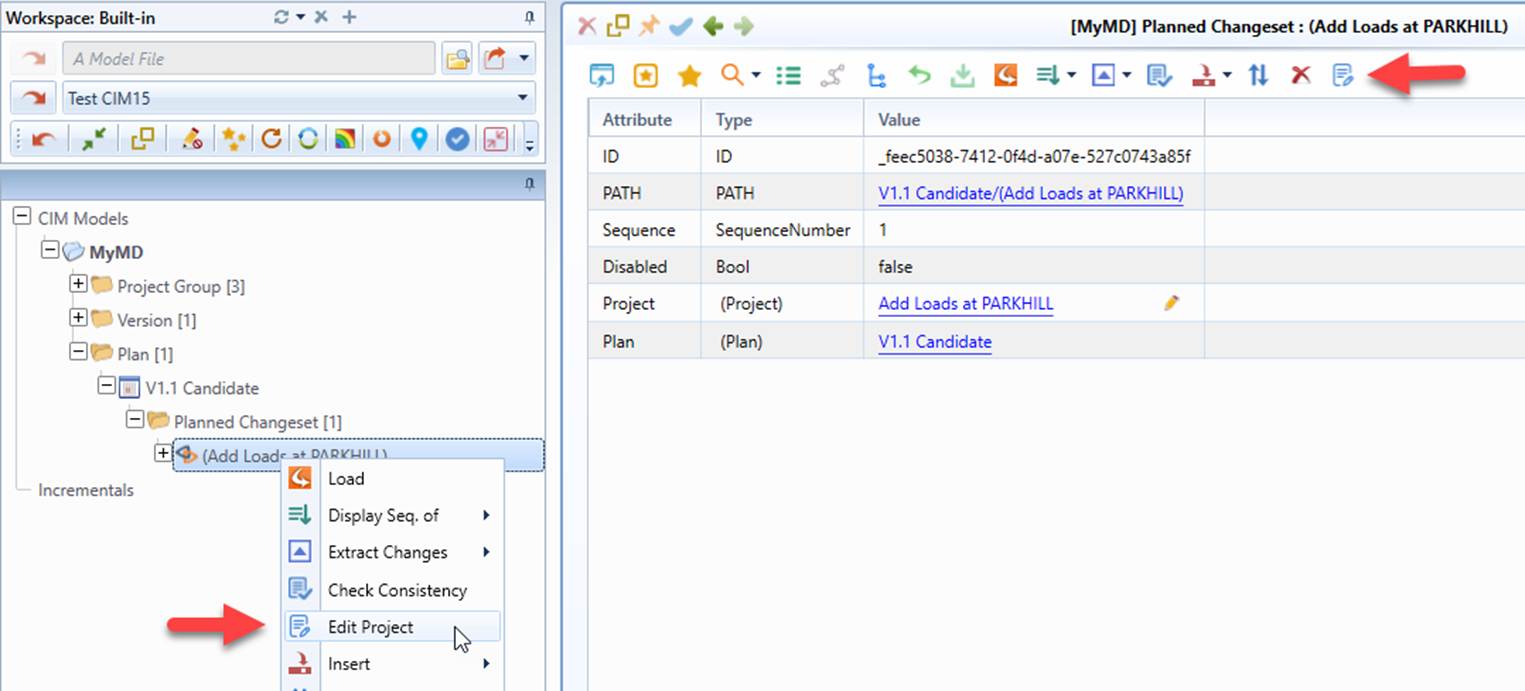
Edit the Project
- Edit the newly-added Project.
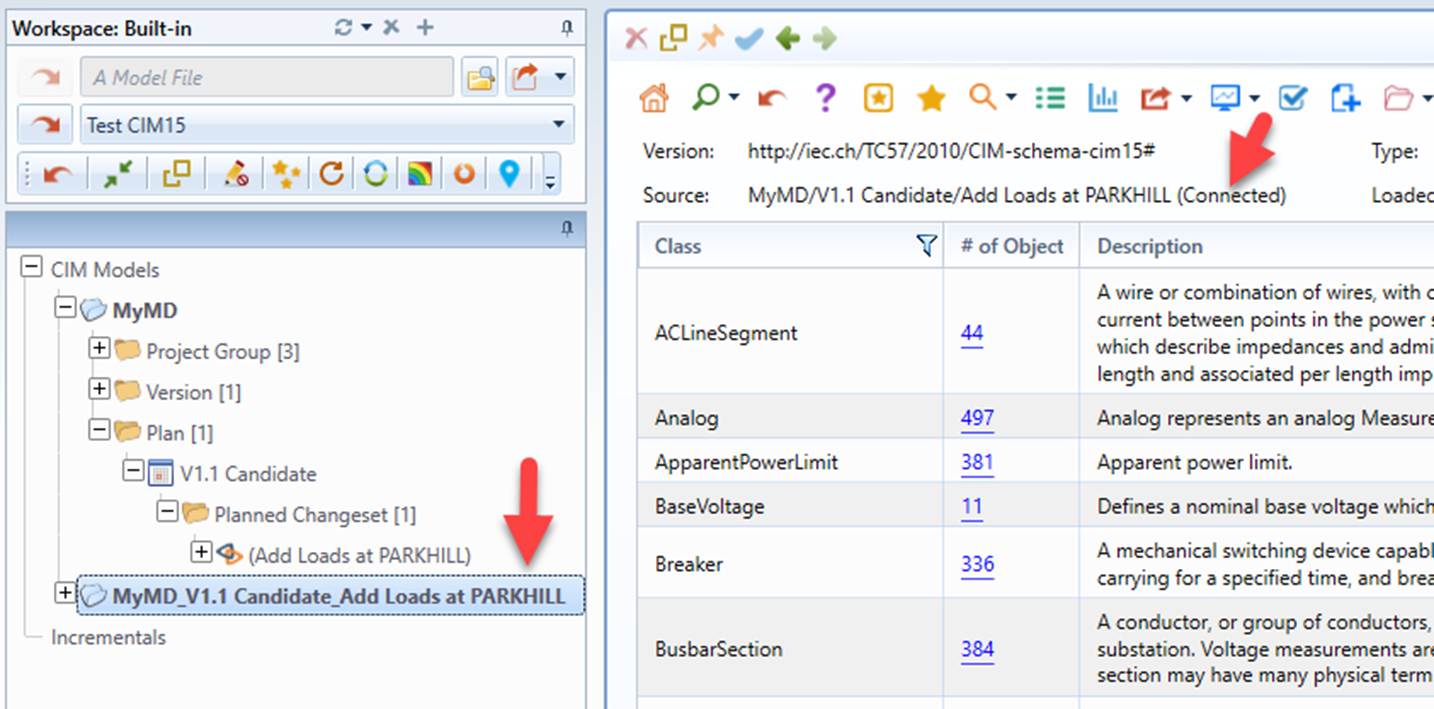
- A connected model will be loaded into the workspace, ready to be edited.
- Search for a Substation where the model changes will be made.
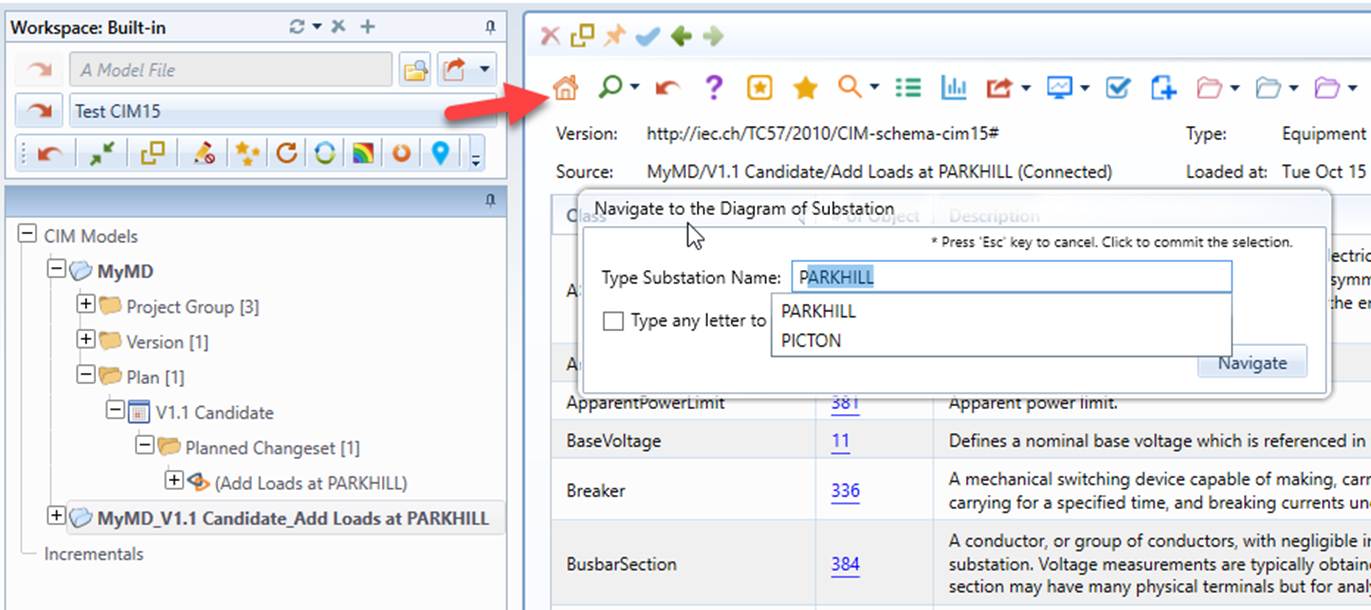
- Bookmark the Substation Diagram so that it can be quickly called.
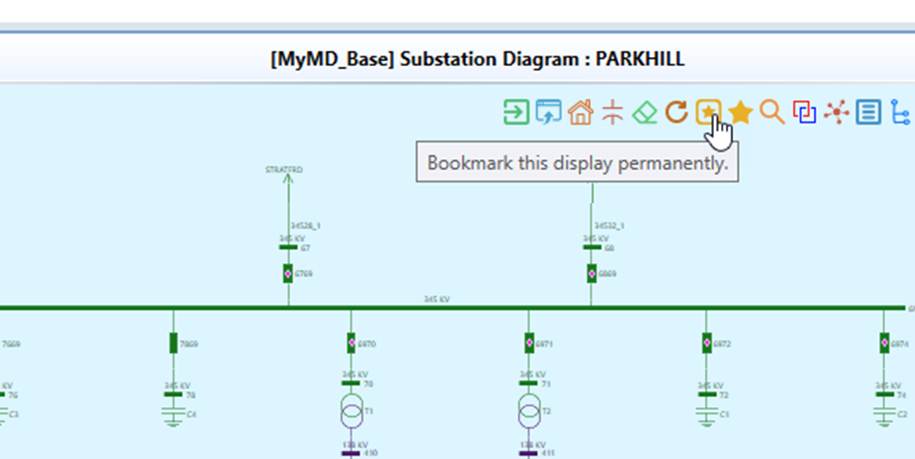
- Make the intended model changes. For example,
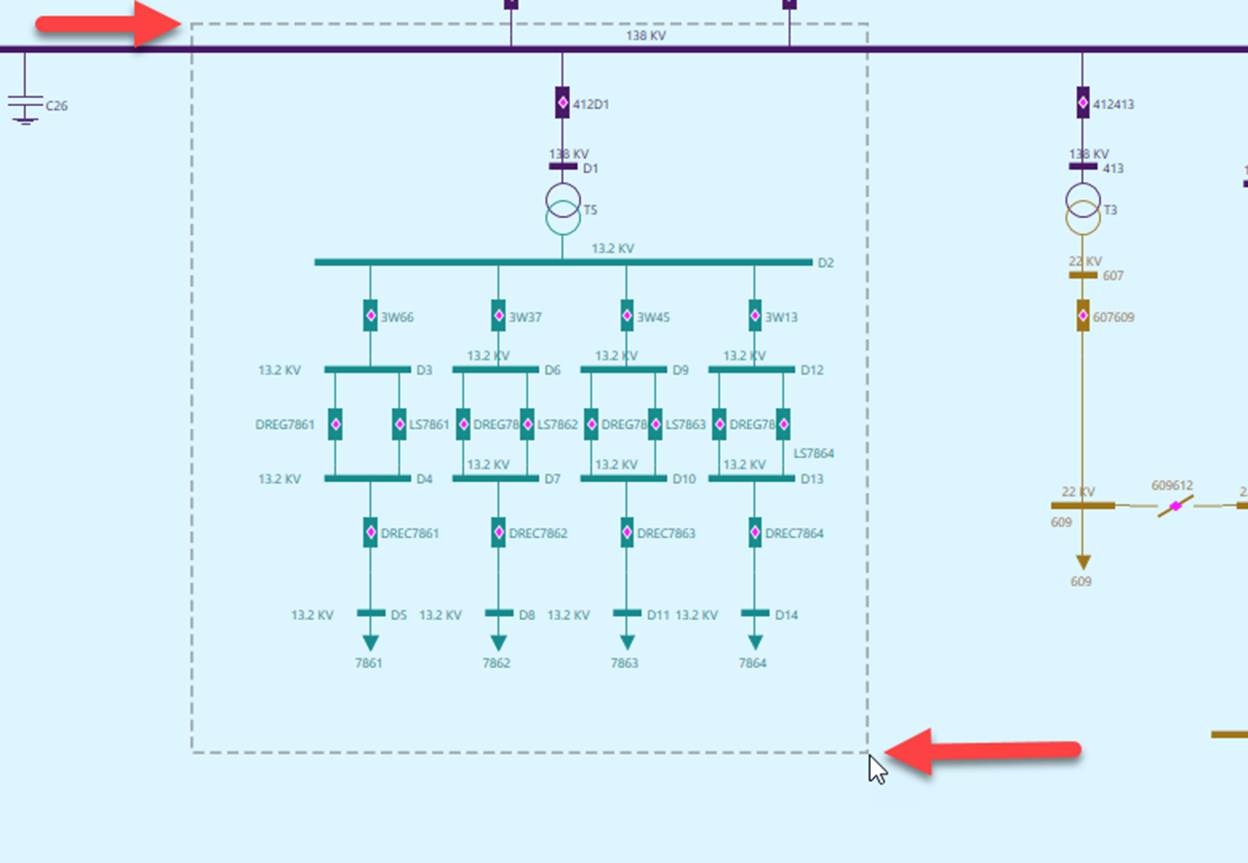
- Select the portion used as template by grouping the network components (through right-mouse-dragging).
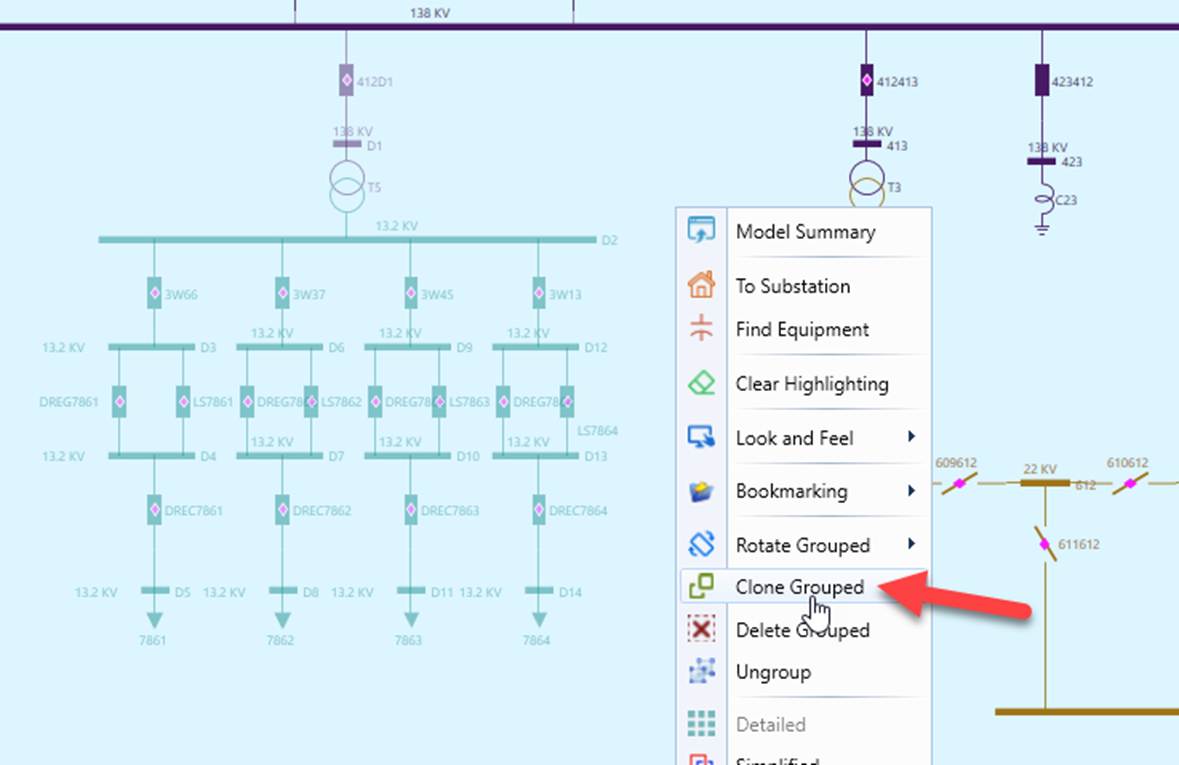
- Clone the grouped network components.
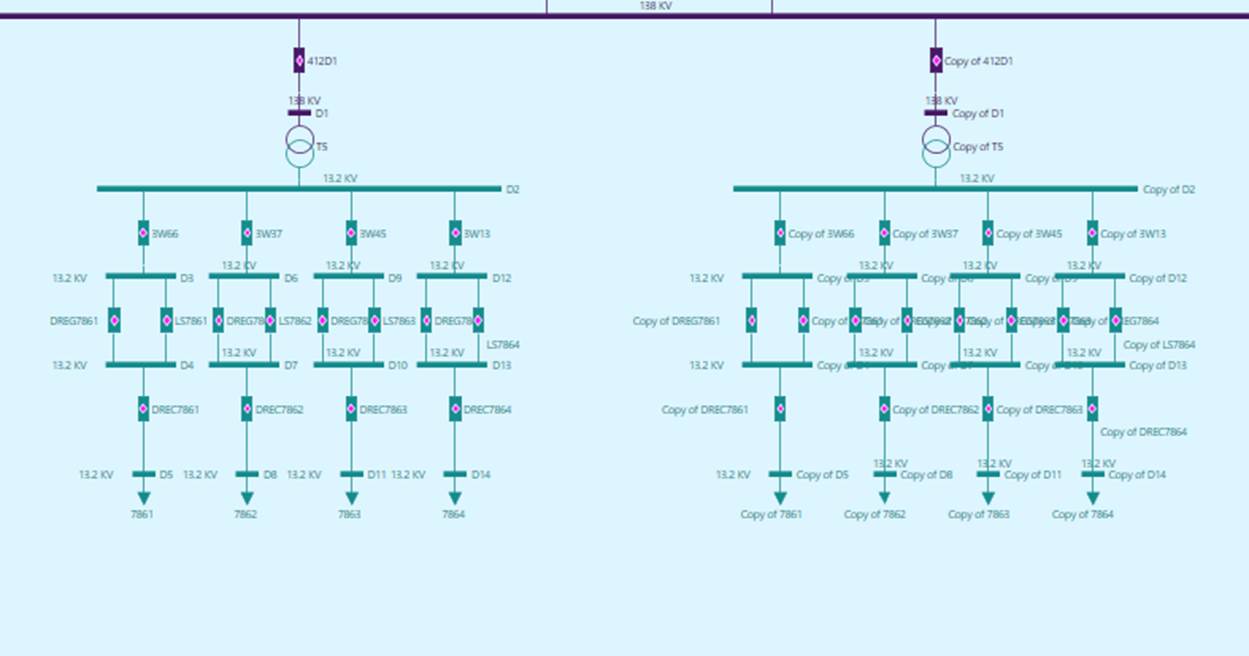
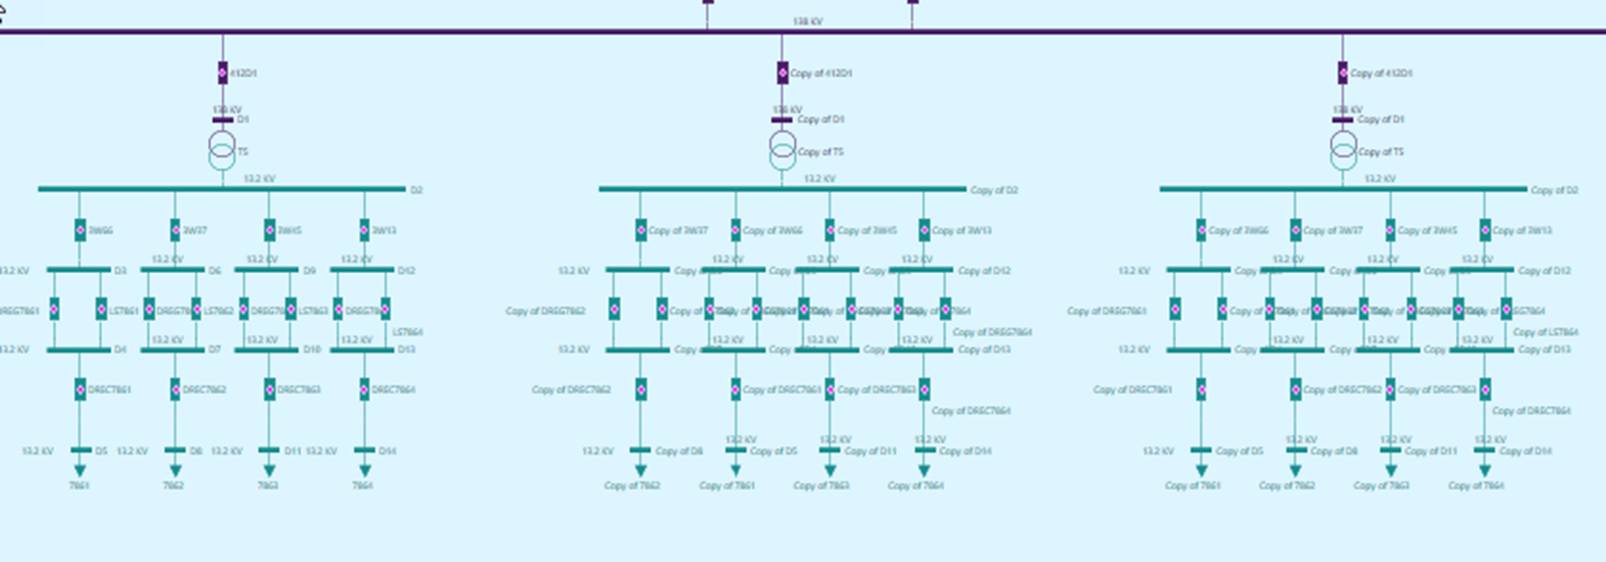
- A new group of feeders are added to the Substation. Any changes made will be instantly stored into the Model Depository as Project.
Add/Edit More Change Sets/Projects
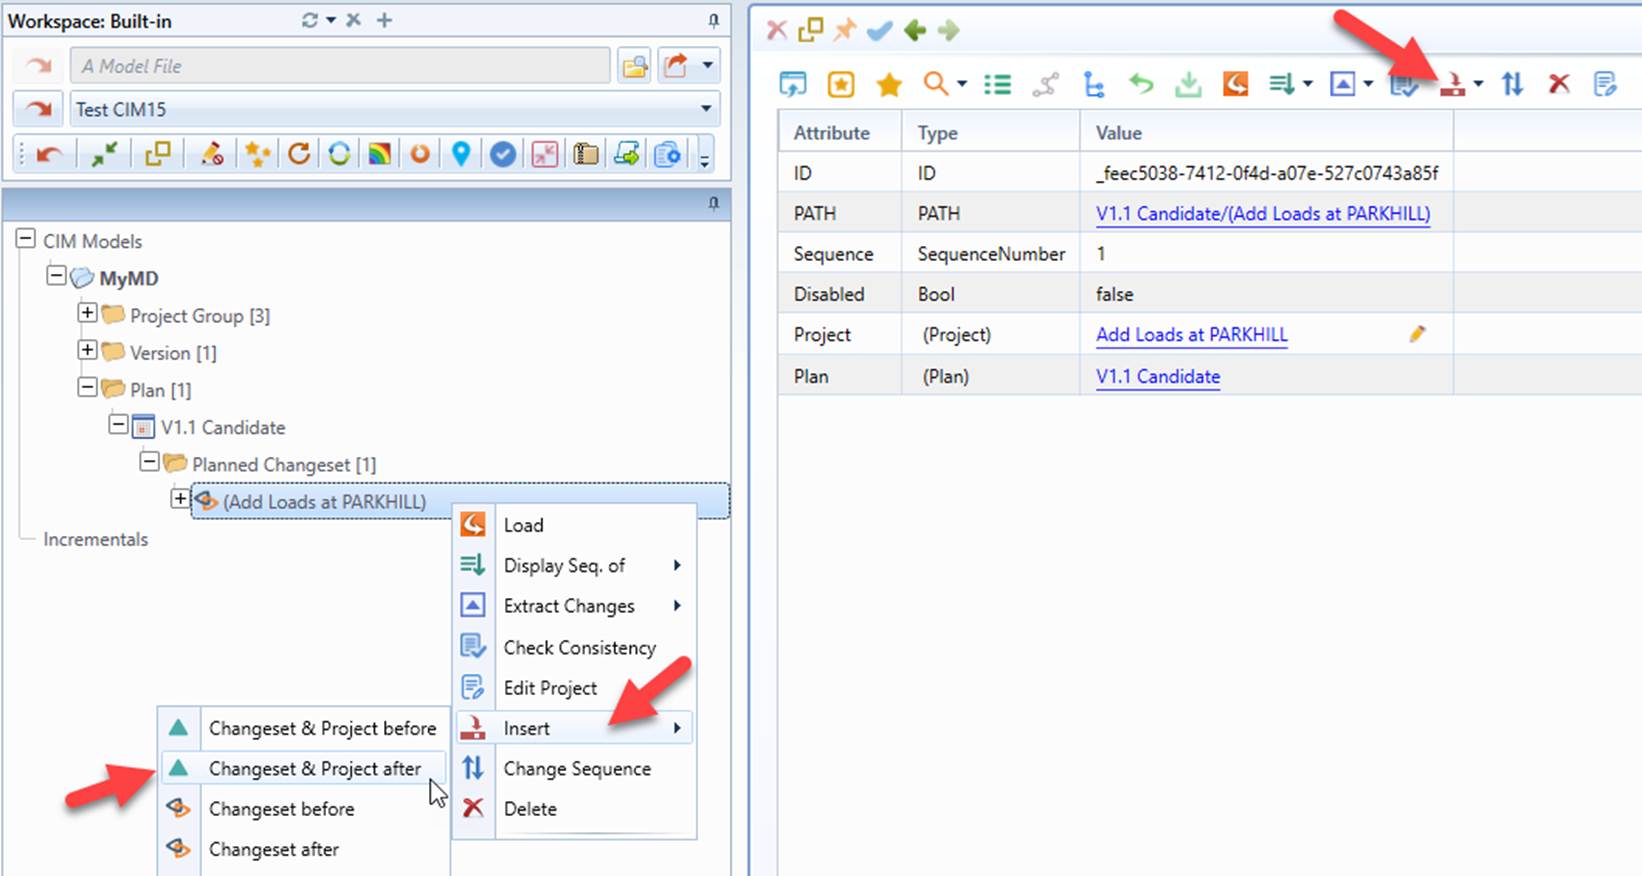
- Insert another pair of Changset/Project after the previous pair.
- Repeat Step 3.2 – 4.5 to make model changes for the new Project, for example add another group of feeders at the same Substation.
Perform QA for the Plan
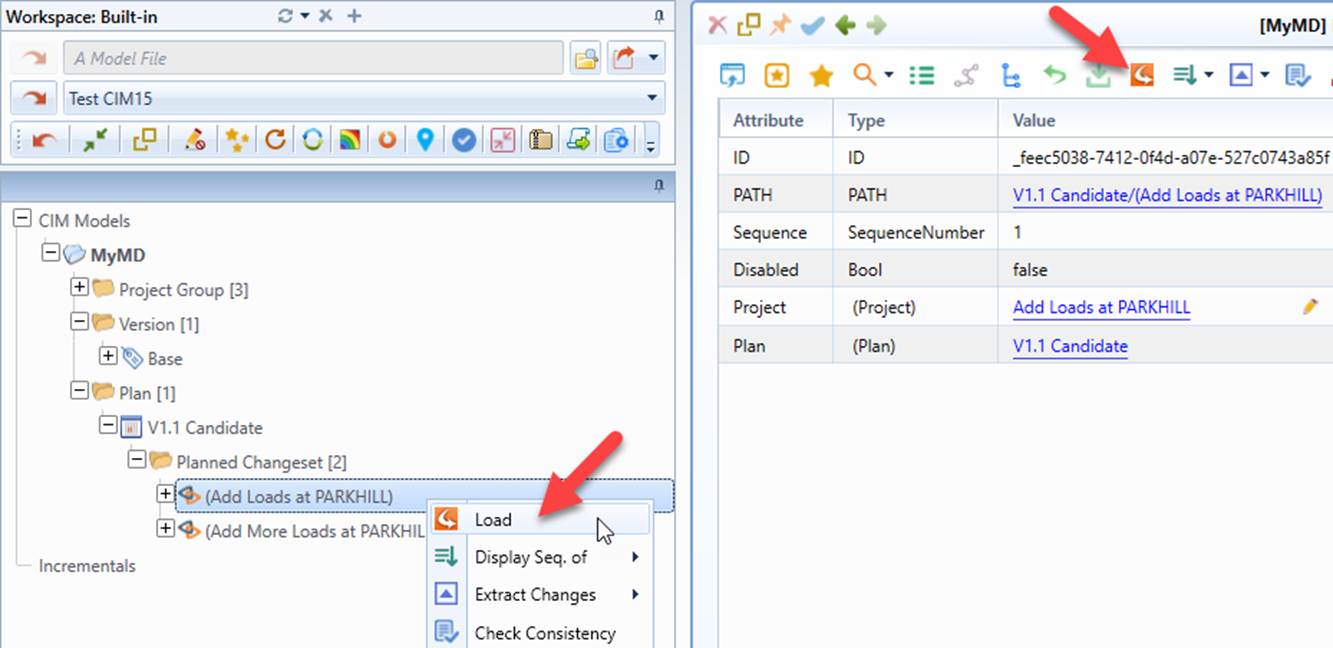
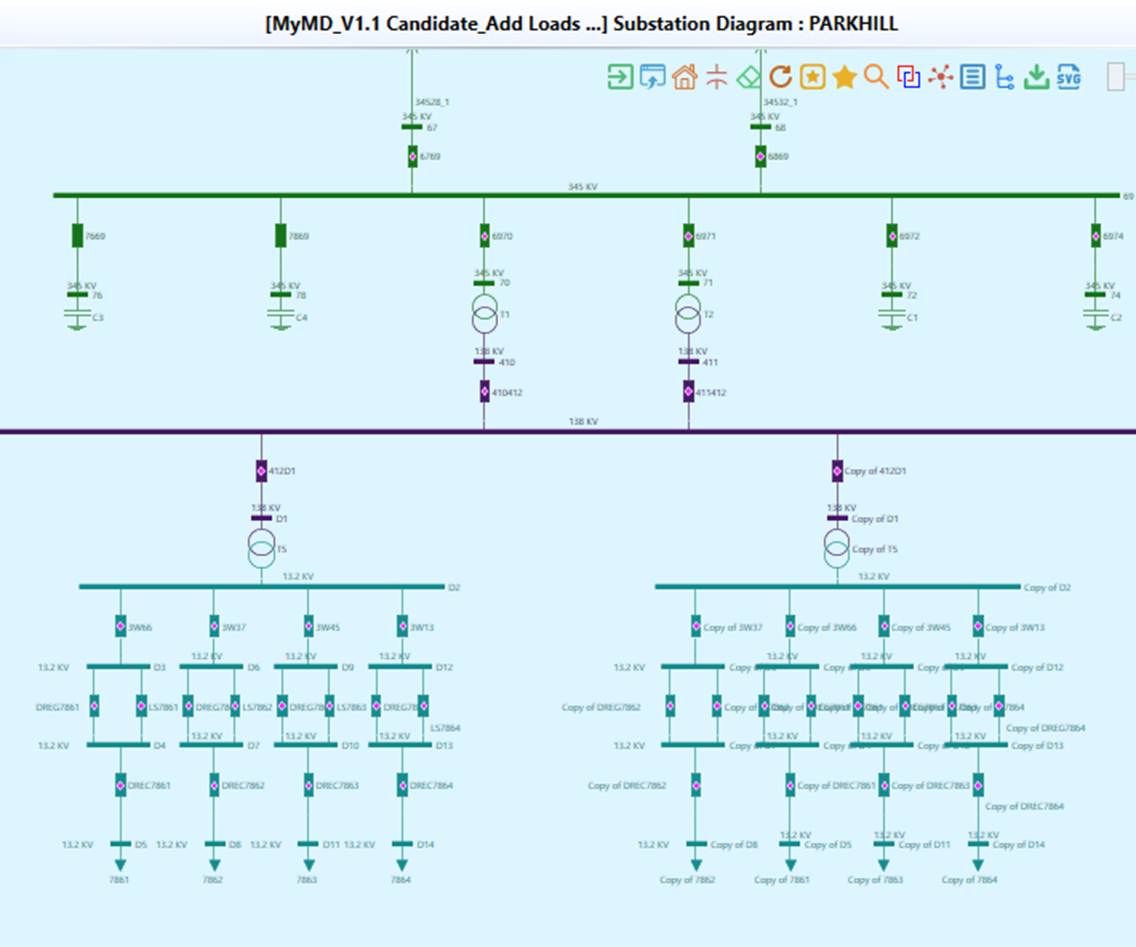
- Sanity Checking: to ensure that the Projects in the Plan are properly sequenced. This is achieved by retrieving a full model into the workspace for a Changset/Project and verifying that all of the changes made in this Project and the previous or precedent Projects are included in the loaded model.
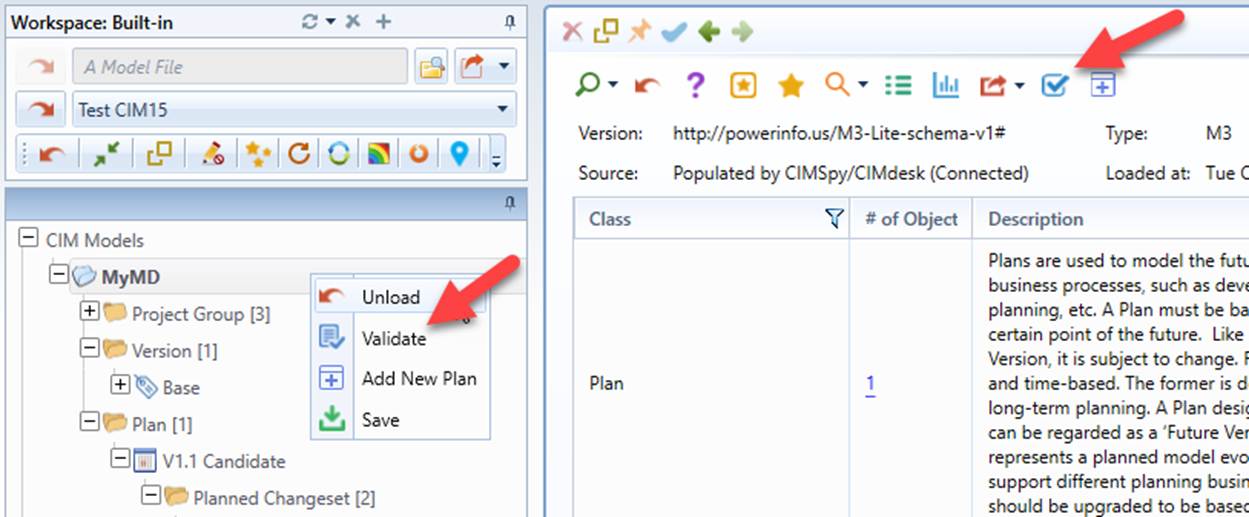
- Validate the current meta-model.
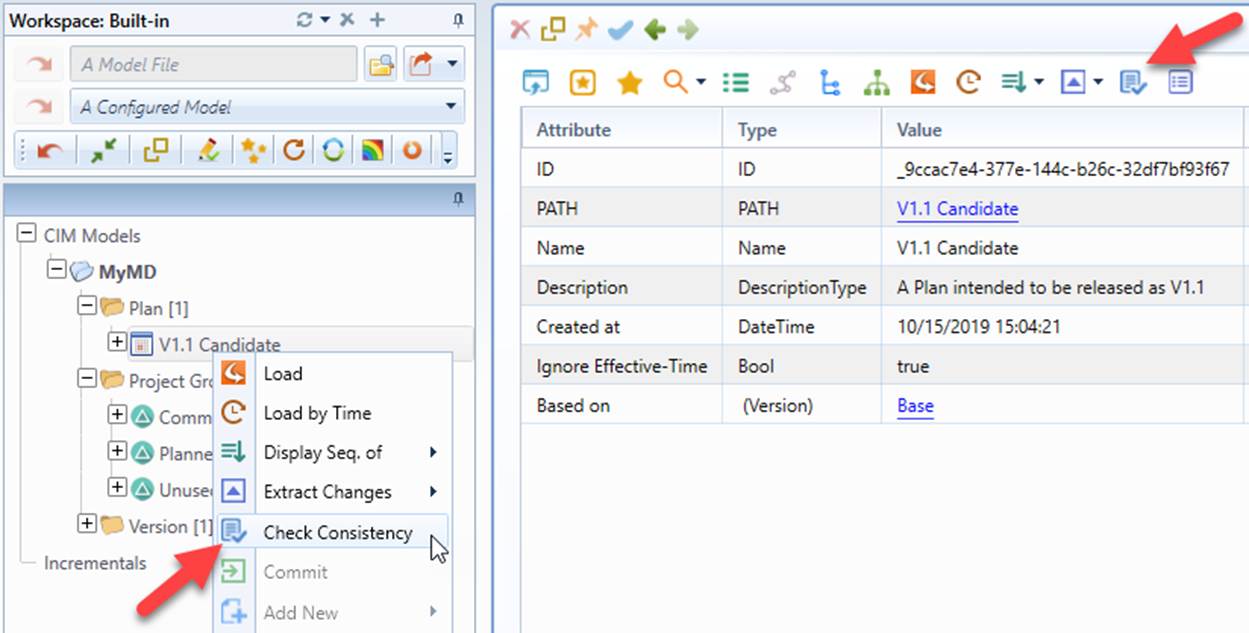
- Check consistency for the entire Plan.
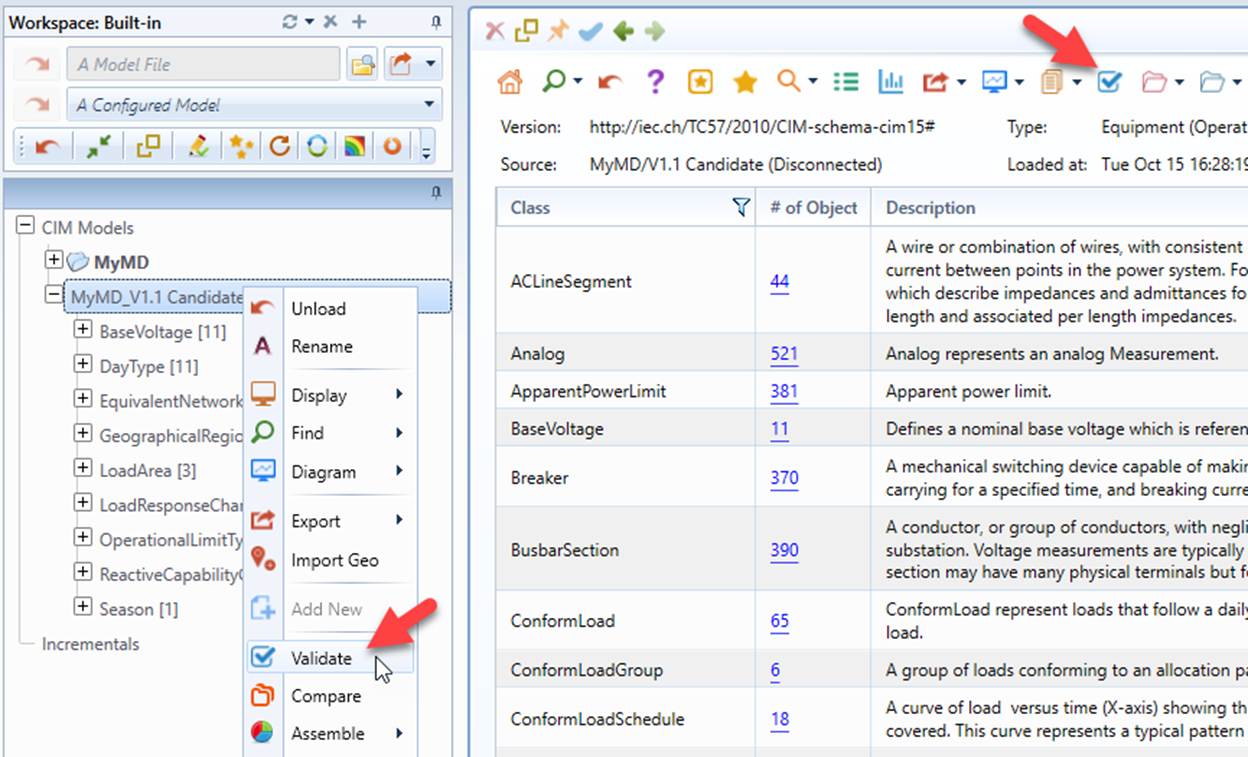
- Validate the full model that include all of the model changes in the Plan
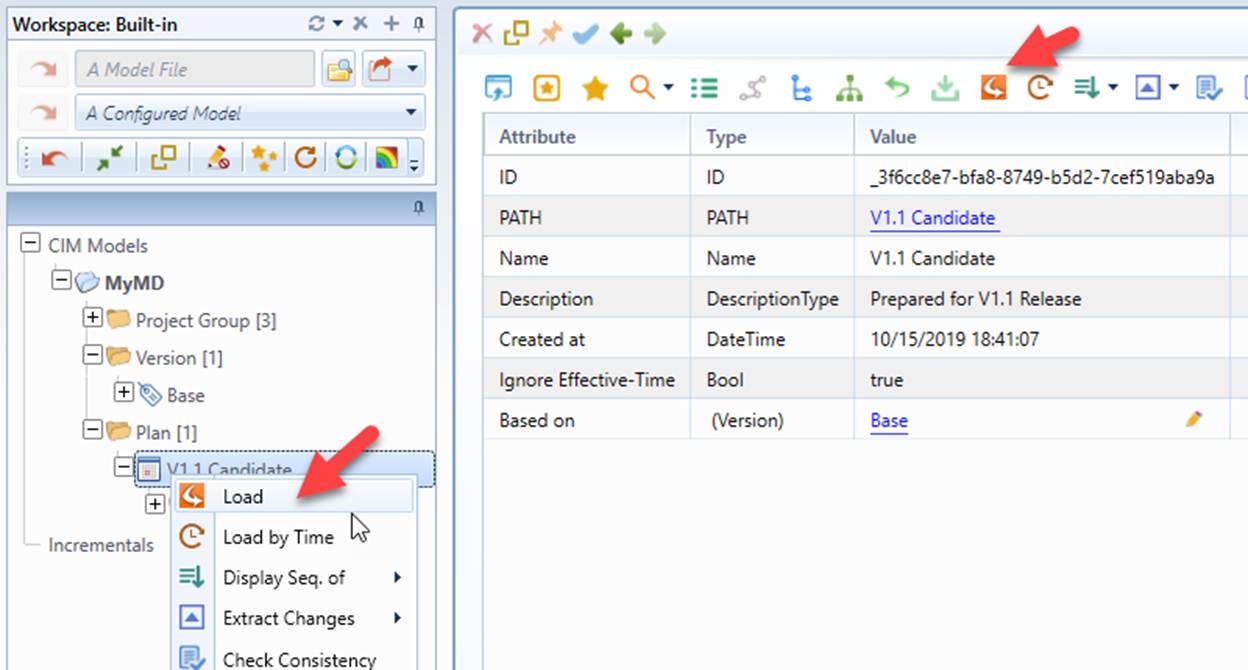
Approve the Plan and Convert It to a New Version
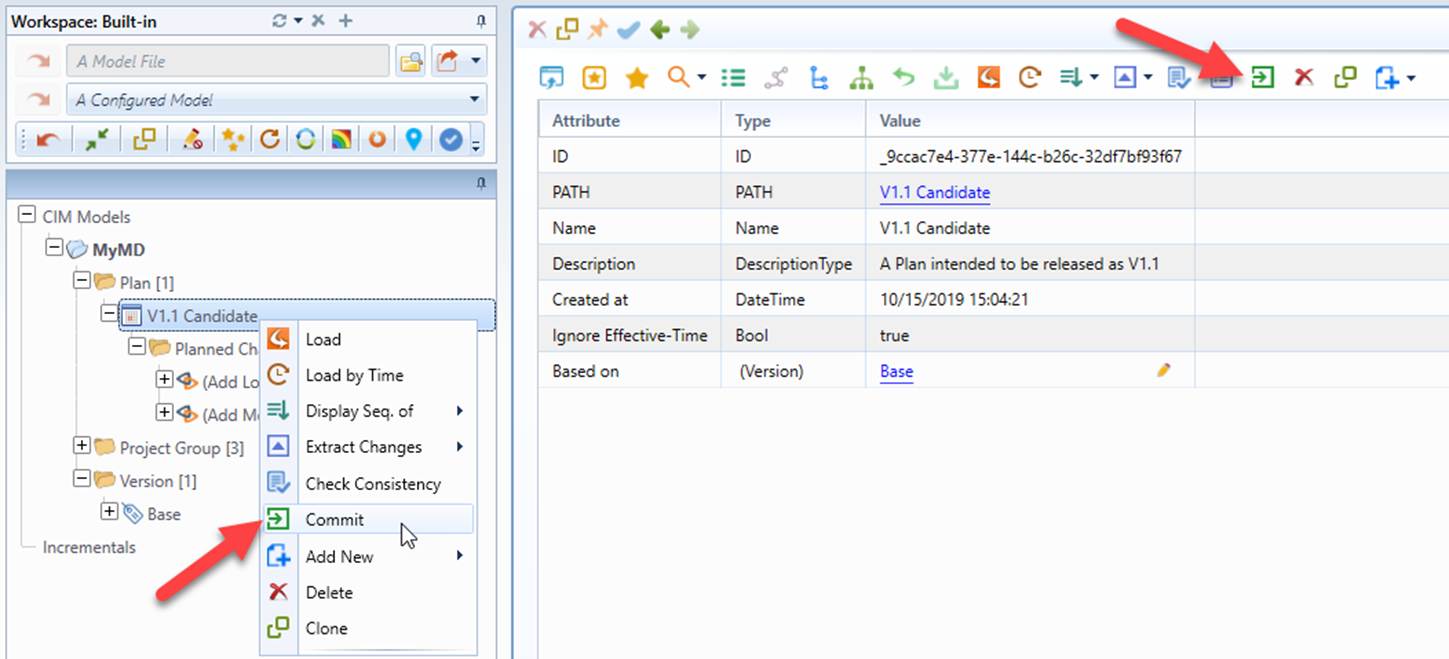
- Convert the Plan to a new Version by Committing the Plan.
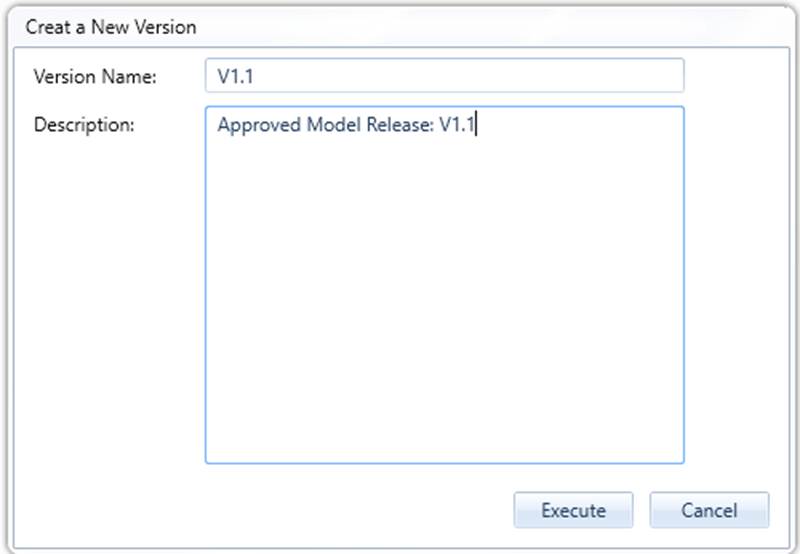
- Provide Version name and description.
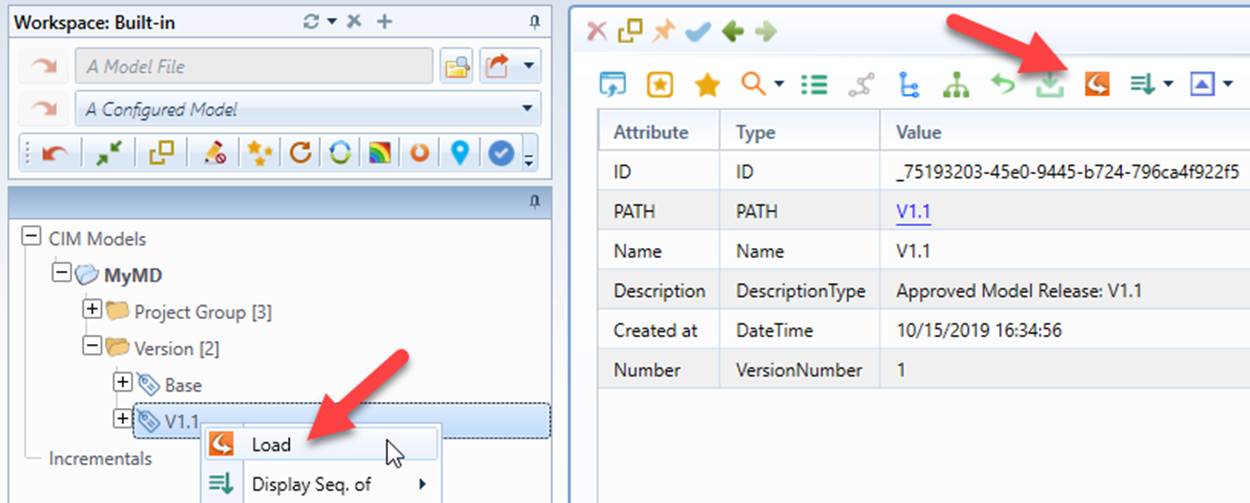
- Load the full model that represents the new Version.
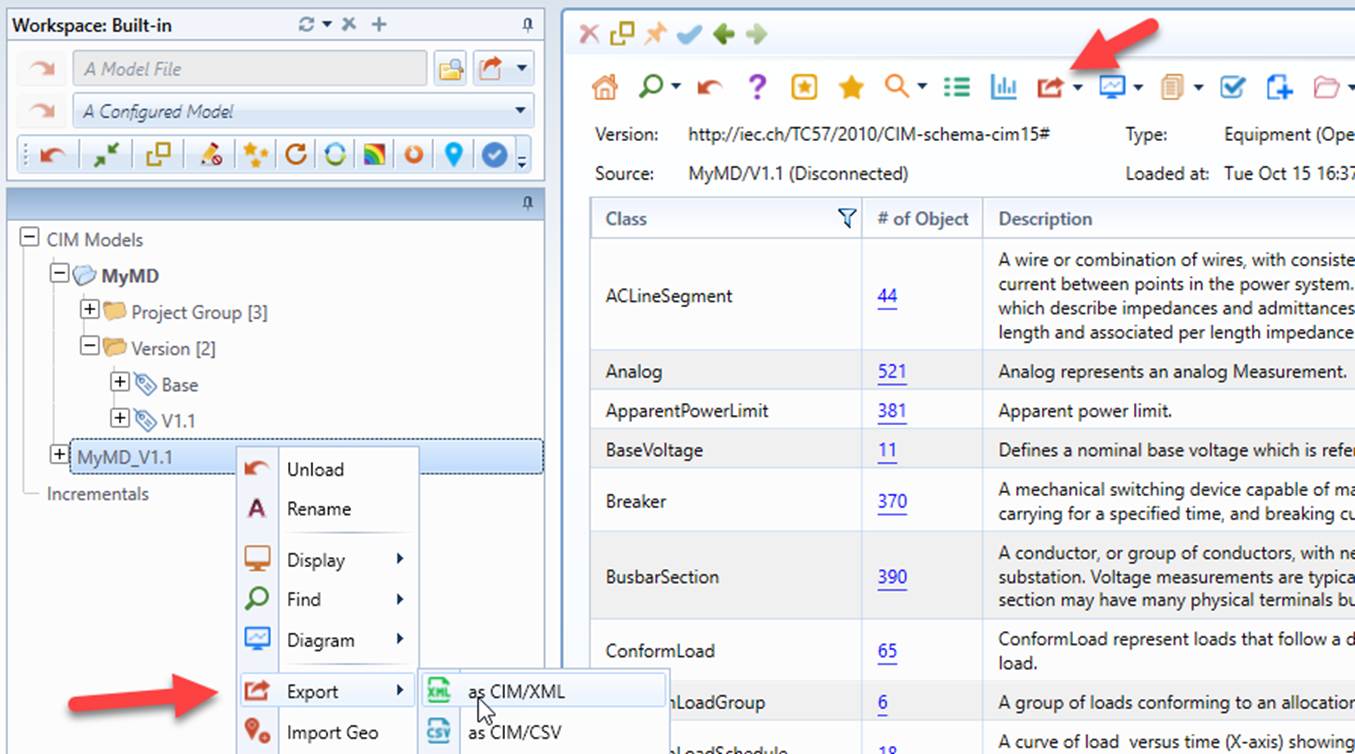
- Export the loaded full model as CIM/XML for release.
Create a New Plan for the Next Model Release
- Create a new Plan for building the next release of the model.
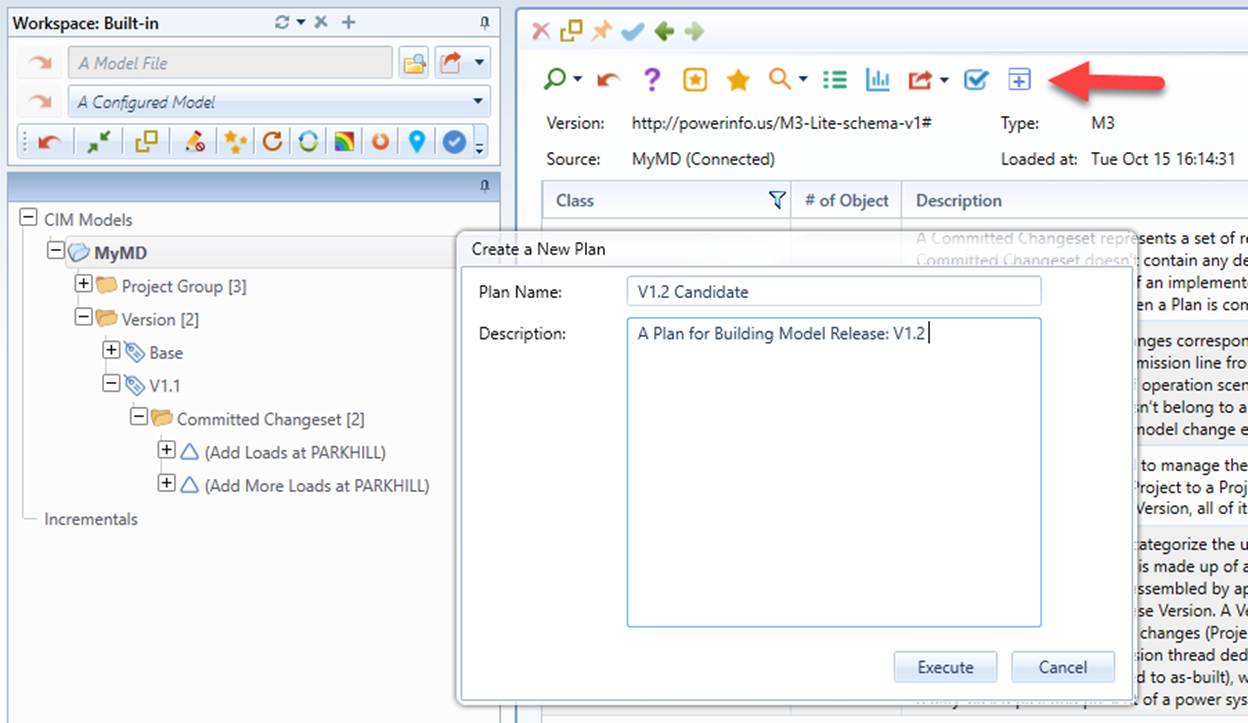
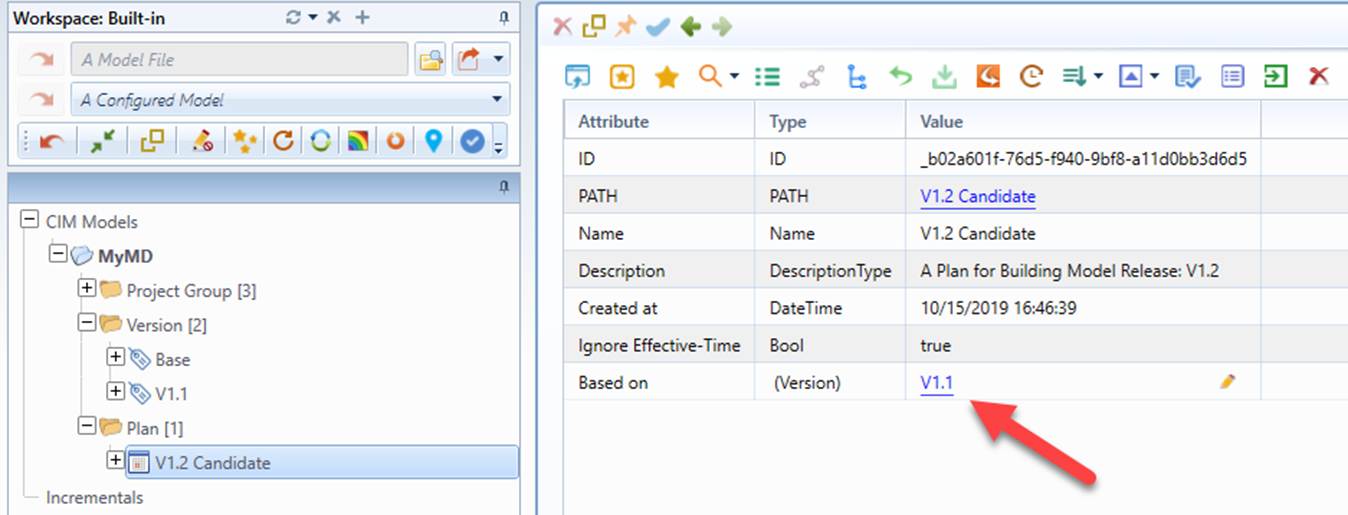
- Set the new Plan based upon the new Version created in Step 7.
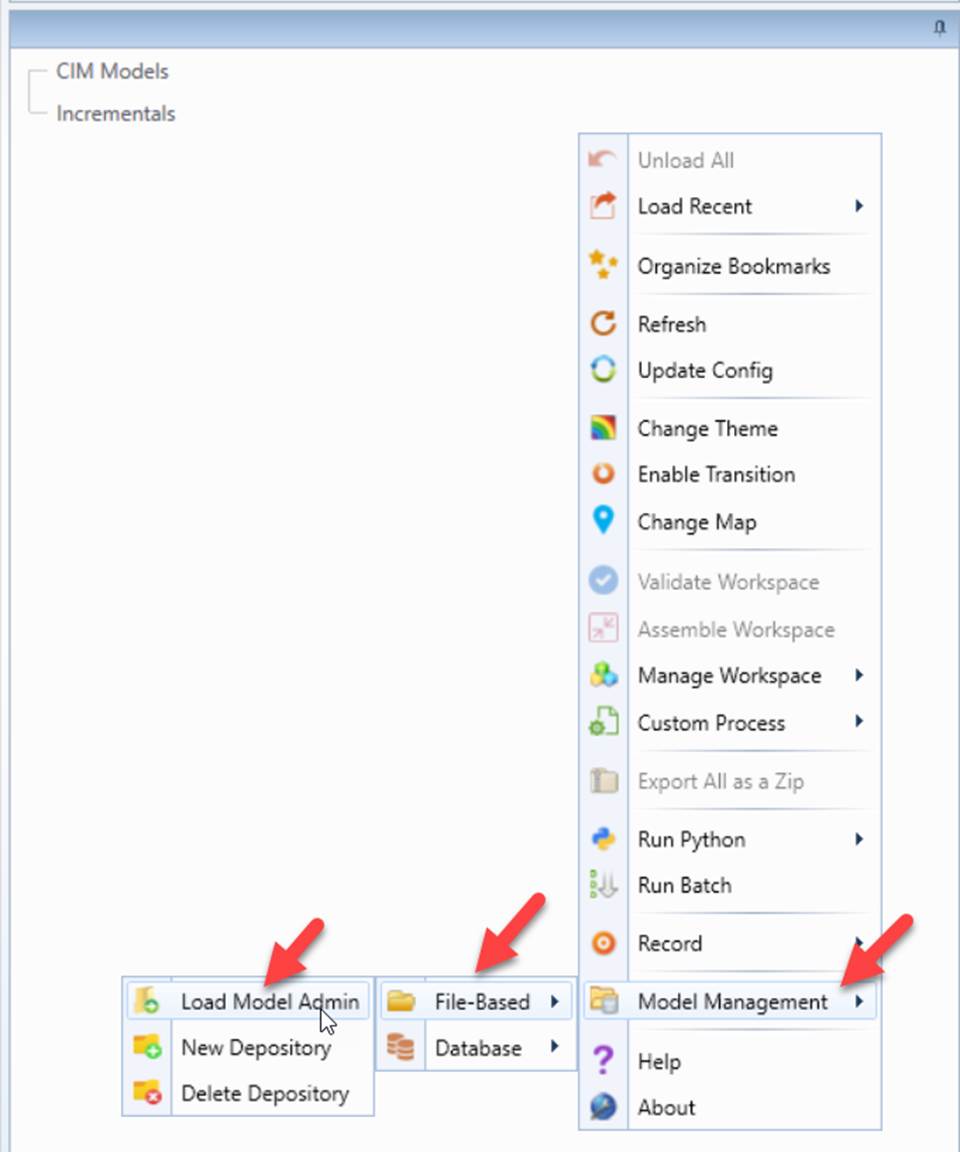
- Repeat Step 3 – 8 and continue the model management process. If the meta-model is unload, it can be reloaded into the workspace via global context menu, as illustrated below.l
Review the Model Management Sample
For reference, the Tool includes a Model Management Sample that can be loaded from the data source dropdown, as illustrated below.
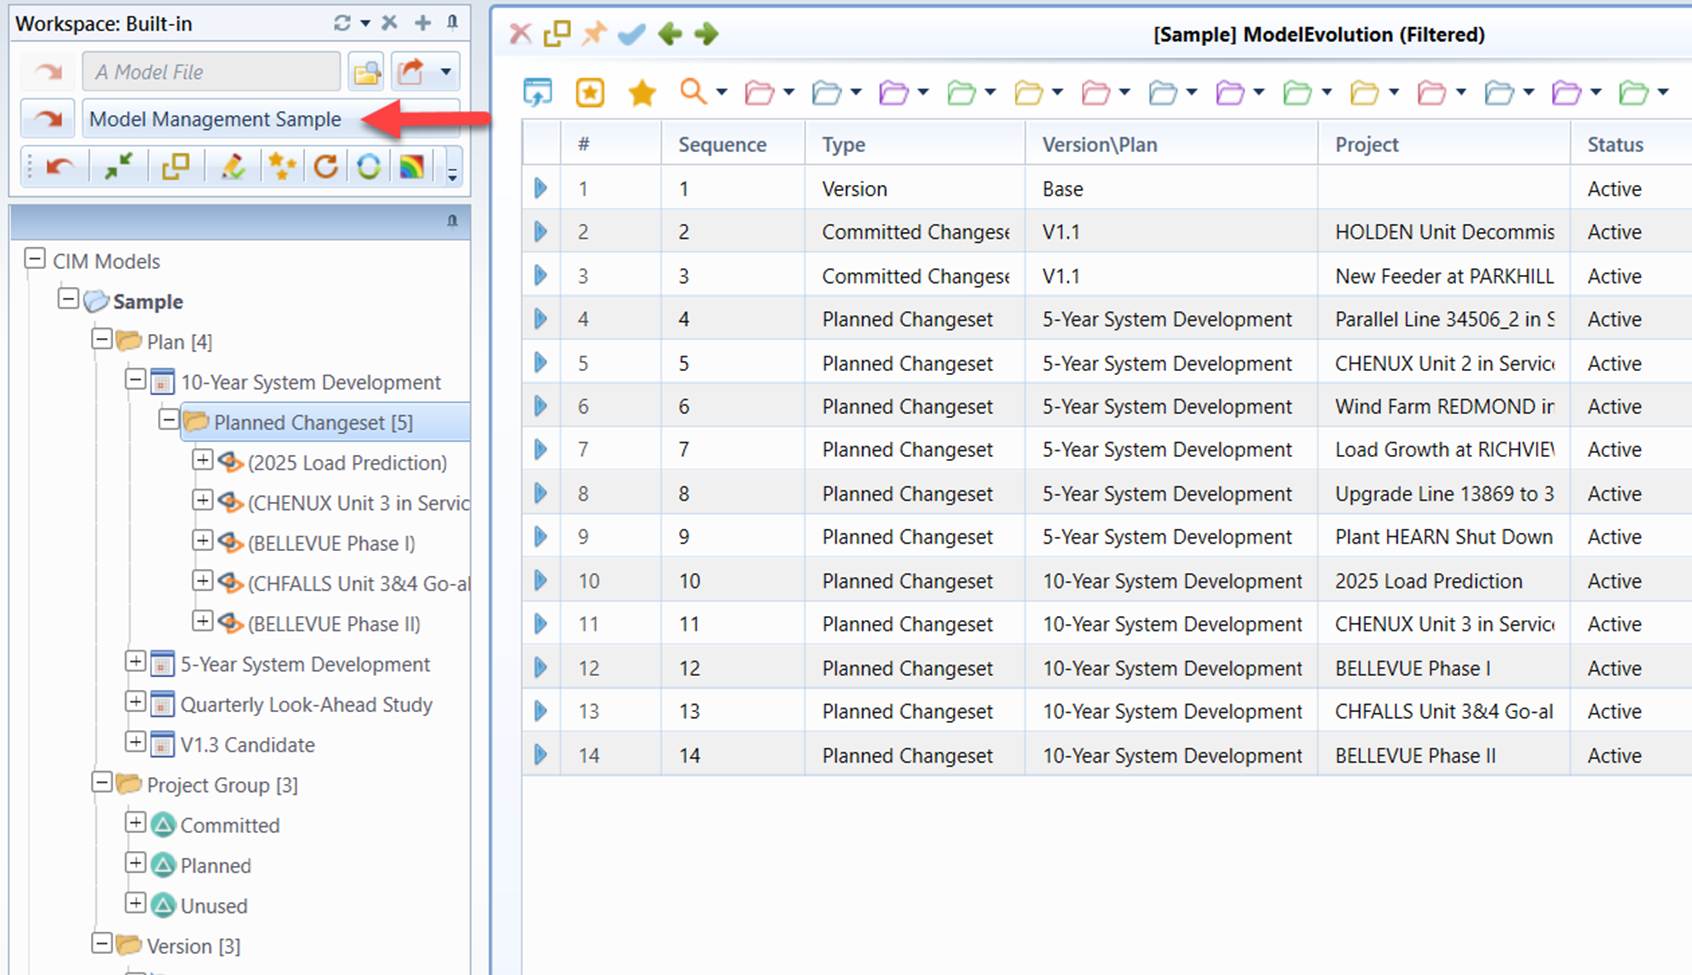
The Sample contains the following:
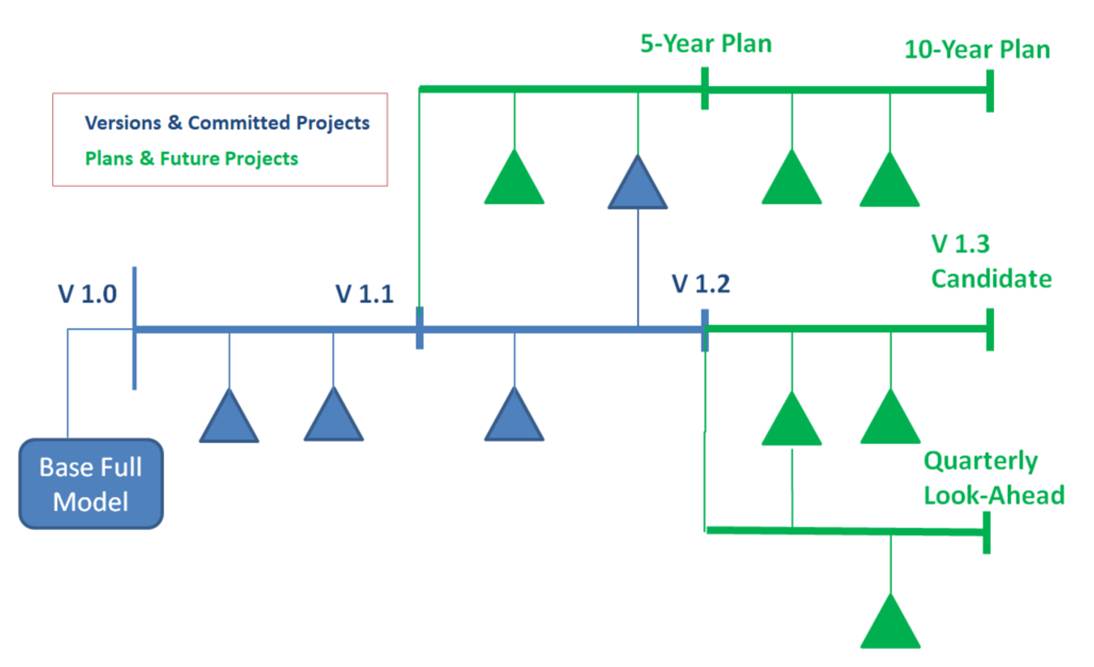
- V1.1/V1.2– Two committed Versions
- V1.3 Candidate – A sequence-based Plan being developed for the next Version, i.e. V1.3
- Quarterly Look-Ahead Study – A time-based Plan prepared for short-term operational study. It is based on the latest Version.
- 5-Year System Development – A time-based Plan prepared for long—term planning over the next 5 years. It is based on an older Version.
- 10-Year System Development– A time-based Plan that extends the 5-year Plan to 10-year.
The model evolution diagram is shown as below: